Hi, I just started to use Files Pro - Multi File Uploder plugin for my Bubble.io project. It seems to work well, but I can’t figure out how to make it to display the file previews horizontaly in rows rather than vertically.
Setting layout doesn’t work.
Please help.
Thx
Hi @pulrix
Thank you so much for reaching out and for choosing Files Pro - Multi File Uploader for your project!  We’re thrilled to hear that it’s working well for you, and we truly appreciate your positive feedback.
Regarding your question about displaying file previews horizontally in rows rather than vertically, we’d love to assist you with this. To better understand what you’re trying to achieve, could you please provide us with:
- A bit more detail about how you’ve set up the plugin in your project.
- Screenshots of your current setup and the way file previews are being displayed.
This will help us get a clearer picture of the issue and suggest the best solution.
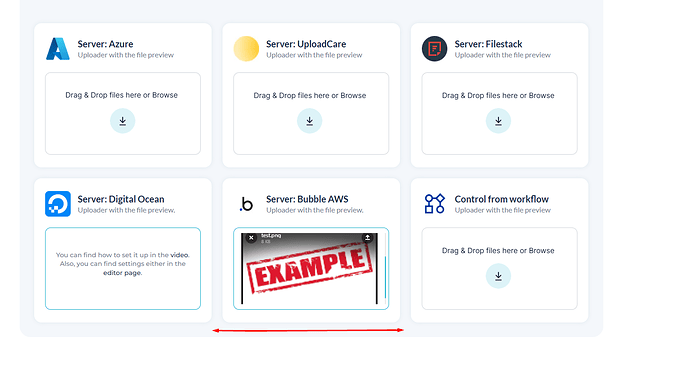
For your reference, I’ve attached a screenshot from our Demo Page, showing how file previews are displayed by default. You can compare your setup with ours and let us know if there are any differences or if you’d like guidance on replicating it.
Looking forward to your reply! We’re here to help make your experience with the plugin as smooth and successful as possible. 
Best wishes,
Support Team
Browse all Zeroqode Plugins for Bubble

Hi, thank you for your reply.
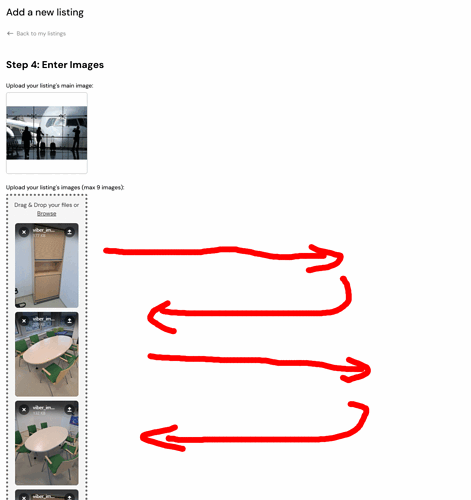
I building a listing for which user uploads a gallery of images.
No matter how I set layout, File Pro - Uploader chains the individul files to be uploaded vertically as seen on the screenshot below, however I need to display it in rows horizontaly as suggested by the red arrows.
Thank you for pointing me the right direction.
Peter
Hi @pulrix and @rsneha027 ,
Thank you for sharing additional details and insights! 
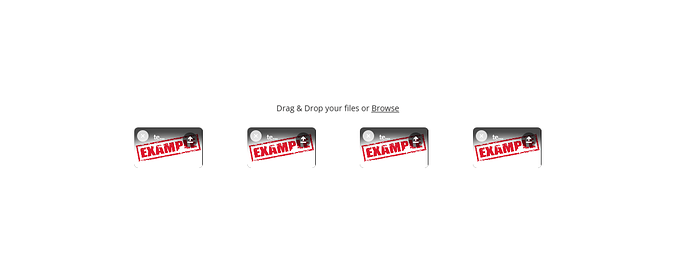
Unfortunately, at the moment, there isn’t a built-in option within the plugin’s element settings to directly switch the file preview display to a horizontal (row) layout. However, there’s a workaround for achieving this using custom CSS.
Here’s how you can implement it:
-
Add an HTML Element:
Place an HTML element on your page to hold the custom CSS.
-
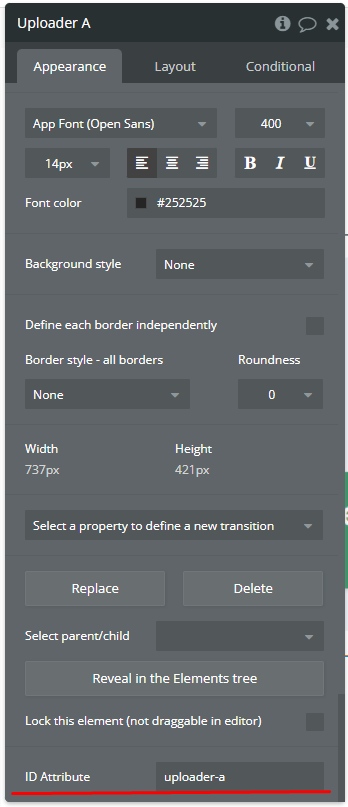
Assign an ID to the Plugin Element:
In the plugin element’s settings, set a unique ID attribute (e.g.,uploader-a).
-
Use the Custom CSS:
Add the following code to your HTML element:
<style>

/* Parent container: Adjust layout for wrapping */
#uploader-a .filepond--list-scroller {
  display: flex; /* Use flexbox for layout */
  flex-wrap: wrap; /* Allow items to wrap to the next row */
  gap: 5px; /* Reduce spacing between items */
  justify-content: flex-start; /* Align items to the left */
  max-width: 100%; /* Prevent the container from growing beyond the viewport */
  width: 100%; /* Ensure the container fits the available width */
  overflow: visible; /* Ensure all content is visible */
  padding: 0; /* Remove padding from the parent container */
}

/* Remove extra space inside the <ul> container */
#uploader-a .filepond--list {
  padding: 0; /* Remove default list padding */
  margin: 0; /* Remove default list margin */
  list-style: none; /* Remove default list styling */
}

/* Style each file preview item */
#uploader-a .filepond--item {
  flex: 0 1 auto; /* Allow items to shrink and grow naturally */
  width: 120px; /* Set consistent width for each item */
  height: 120px; /* Set consistent height for each item */
  margin: 0; /* Remove additional margin around items */
  overflow: hidden; /* Prevent content from overflowing */
  position: relative; /* Enable positioning for child elements */
  display: flex; /* Center content inside the item */
  align-items: center; /* Vertically align content */
  justify-content: center; /* Horizontally align content */
}

/* Reset unnecessary transforms */
#uploader-a .filepond--item {
  transform: none !important; /* Override default transform */
}

/* Style the panel containing the preview image */
#uploader-a .filepond--panel-root {
  width: 100%; /* Fill the parent item */
  height: 100%; /* Fill the parent item */
  display: flex; /* Center the content */
  align-items: center;
  justify-content: center;
  overflow: hidden; /* Prevent overflow issues */
}

/* Ensure the image preview is displayed correctly */
#uploader-a .filepond--panel-center {
  max-width: 100%; /* Ensure the image fits within the container */
  max-height: 100%; /* Maintain aspect ratio */
  object-fit: cover; /* Crop the image to fit the container */
  display: block; /* Ensure it displays as a block element */
}

/* Optional: Style the delete/remove button */
#uploader-a .filepond--action-remove-item {
  position: absolute;
  top: 5px;
  left: 5px;
  background-color: rgba(255, 255, 255, 0.8);
  border-radius: 50%;
  width: 20px;
  height: 20px;
  display: flex;
  align-items: center;
  justify-content: center;
  cursor: pointer;
  font-size: 12px;
  z-index: 10;
}


</style>
Replace uploader-a with the actual ID used in the plugin settings.
This approach should give you a horizontal row layout with the flexibility to adjust spacing and alignment to your needs.
Let me know if this resolves your issue or if you need further guidance. We’re here to help! 
Best regards,
Support Team
Browse all Zeroqode Plugins for Bubble

Hi @pulrix
I wanted to follow up and see if you’ve had a chance to go over the steps we shared earlier. If the issue persists or if there’s anything else you’d like help with, please don’t hesitate to let us know.
We’re always here to assist and would be happy to help address any challenges you might be facing.
Looking forward to your reply!
Best regards,
Support Team
Browse all Zeroqode Plugins for Bubble


