Services Plugins FAQs

Stripe Marketplace Token

Hello,

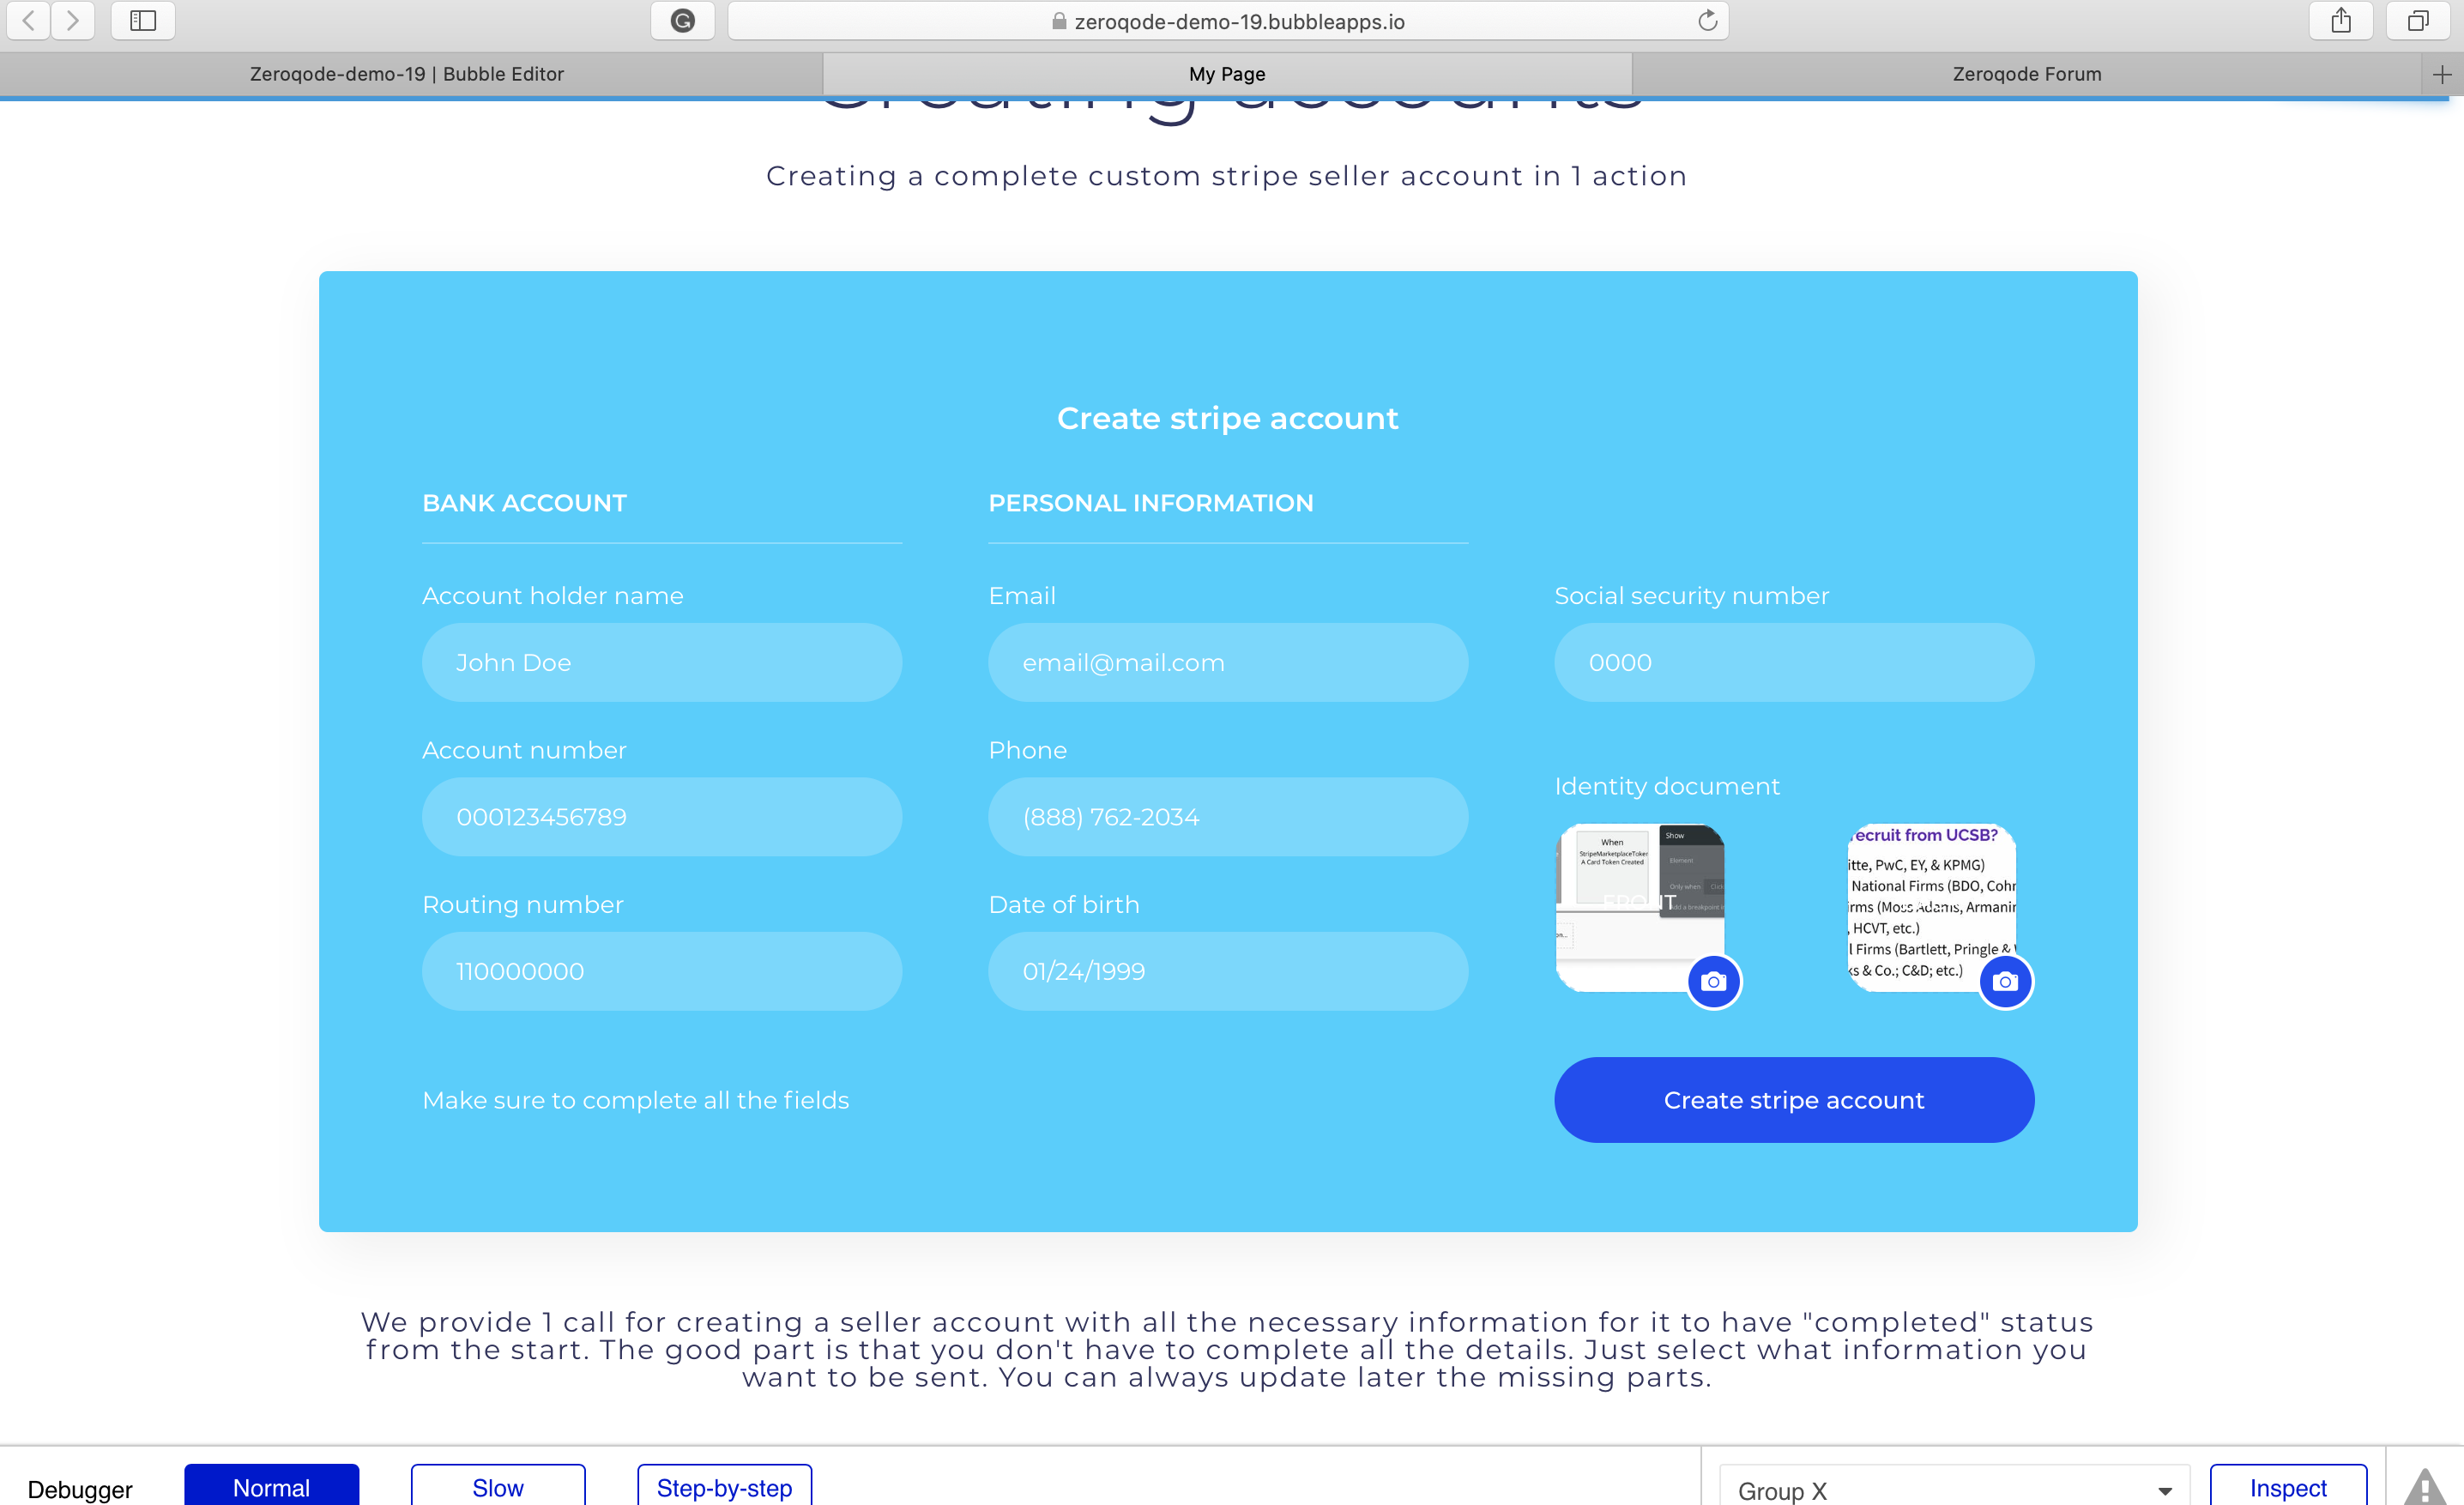
I am facing an issue with both creating tokens and creating a new seller. I’d like to do a custom onboarding. I want the seller to put in their bank account # and routing # then SSN and other relevant info to be able to create them into a New Seller - Individual. Below is my workflow:

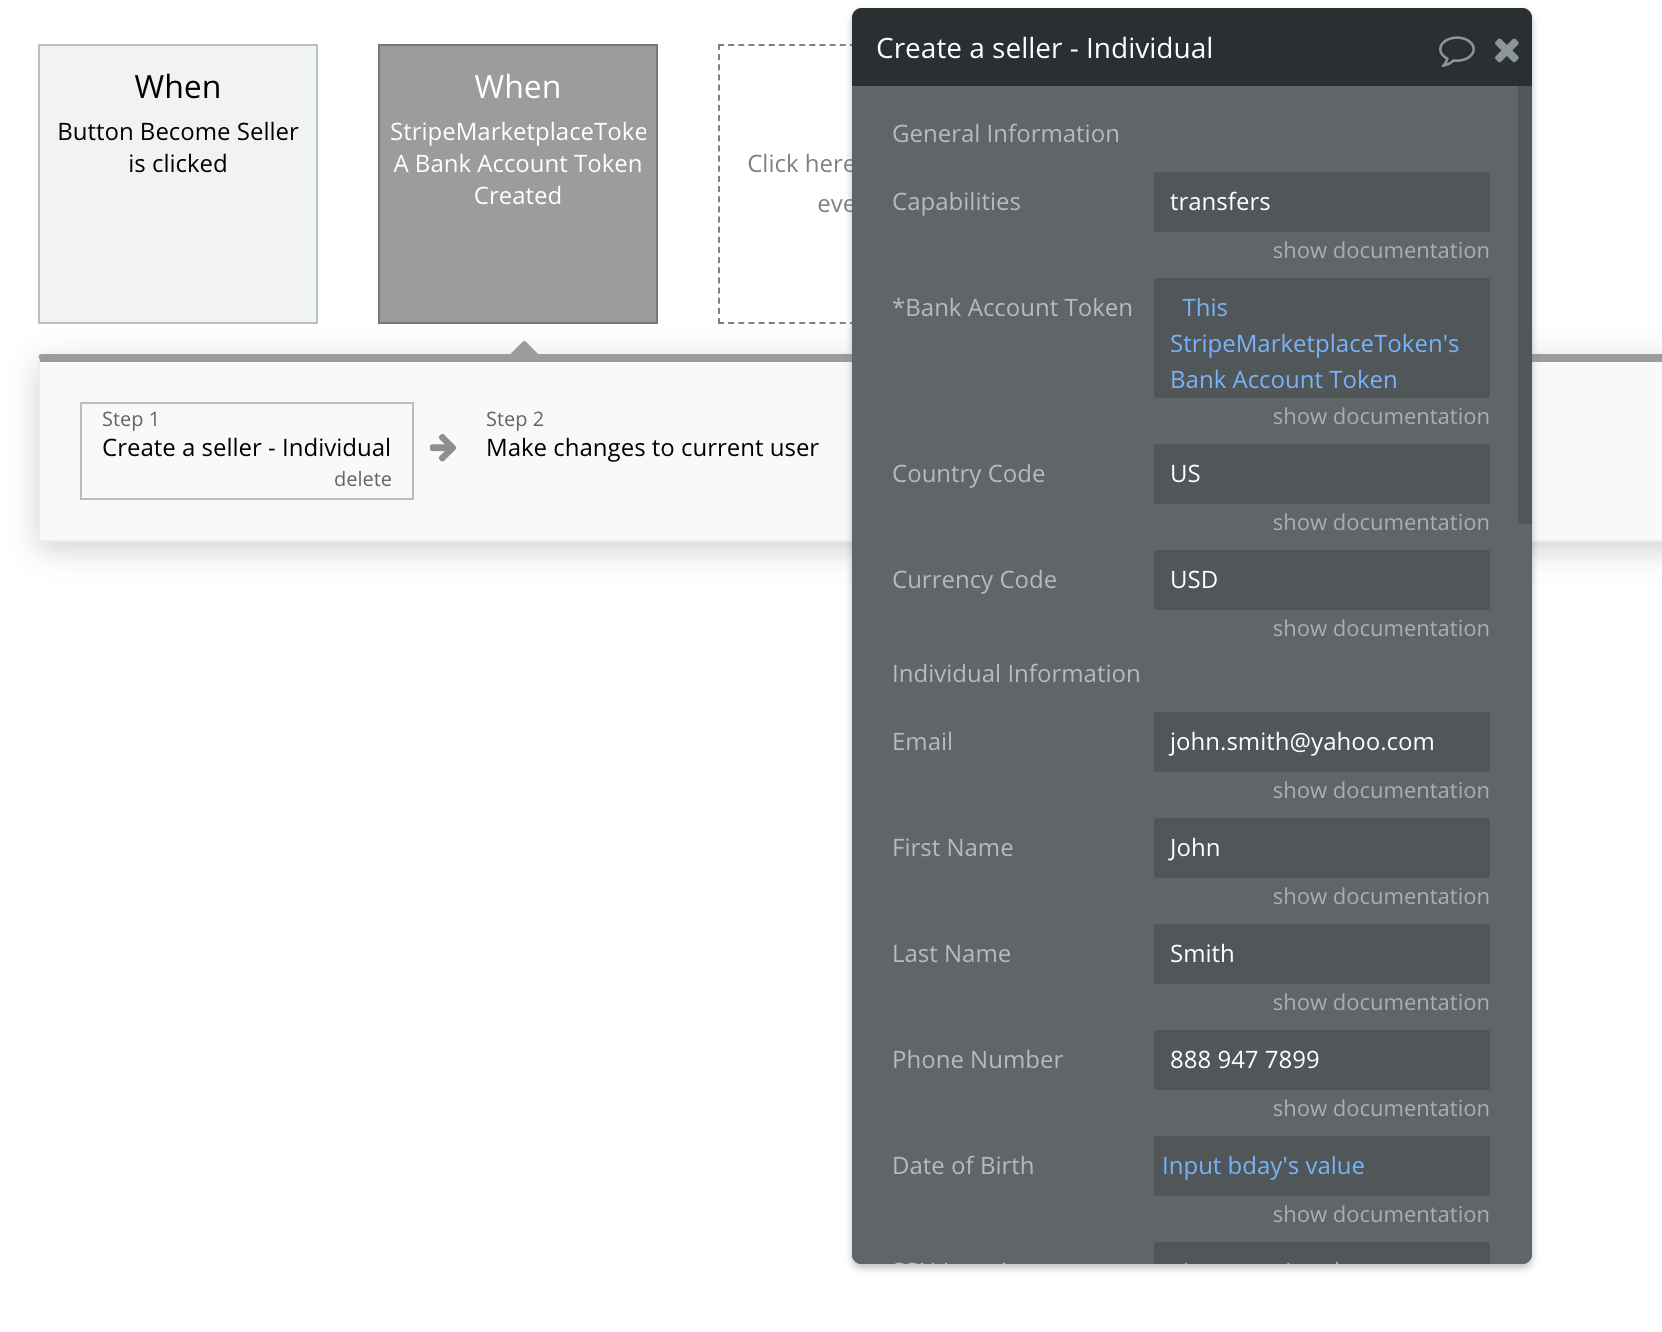
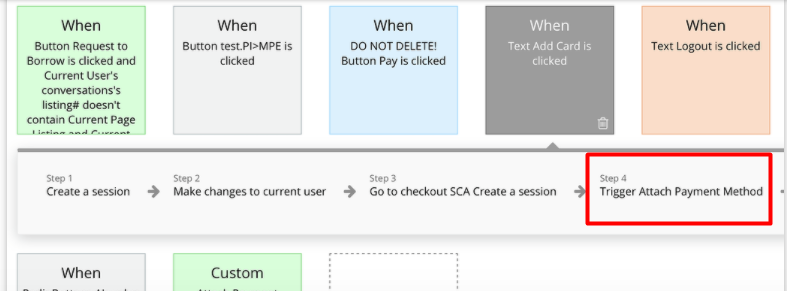
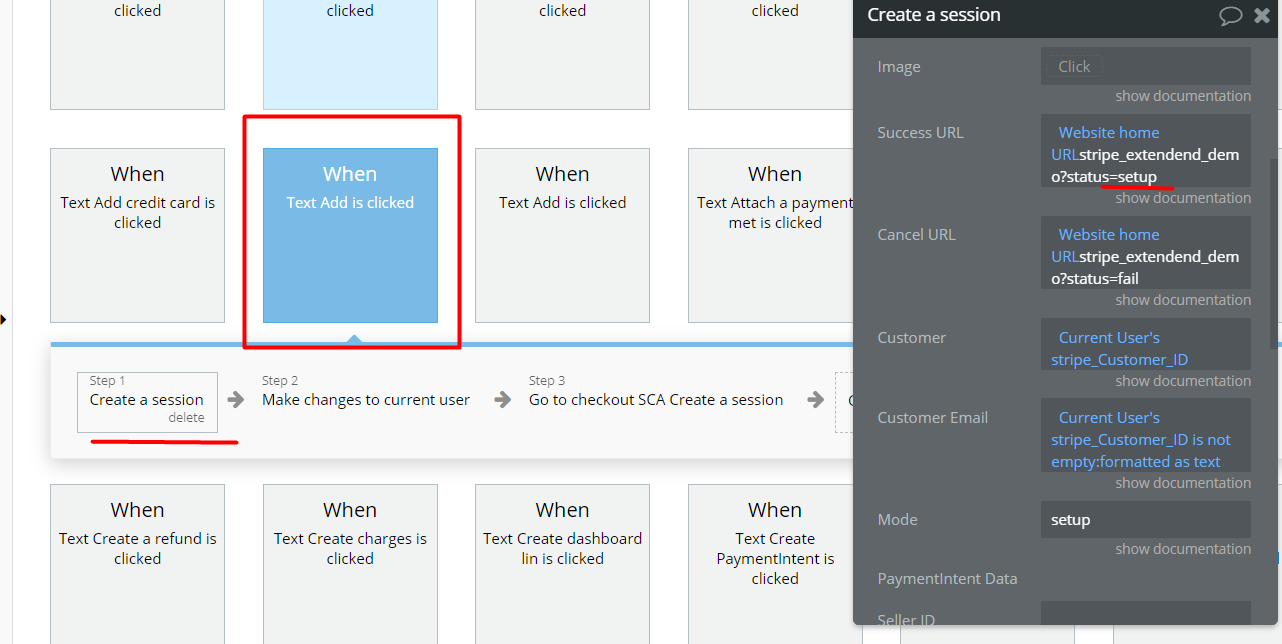
Step 1: Button Become Seller is clicked → Create Bank Account Token StripeMarketplaceToken A

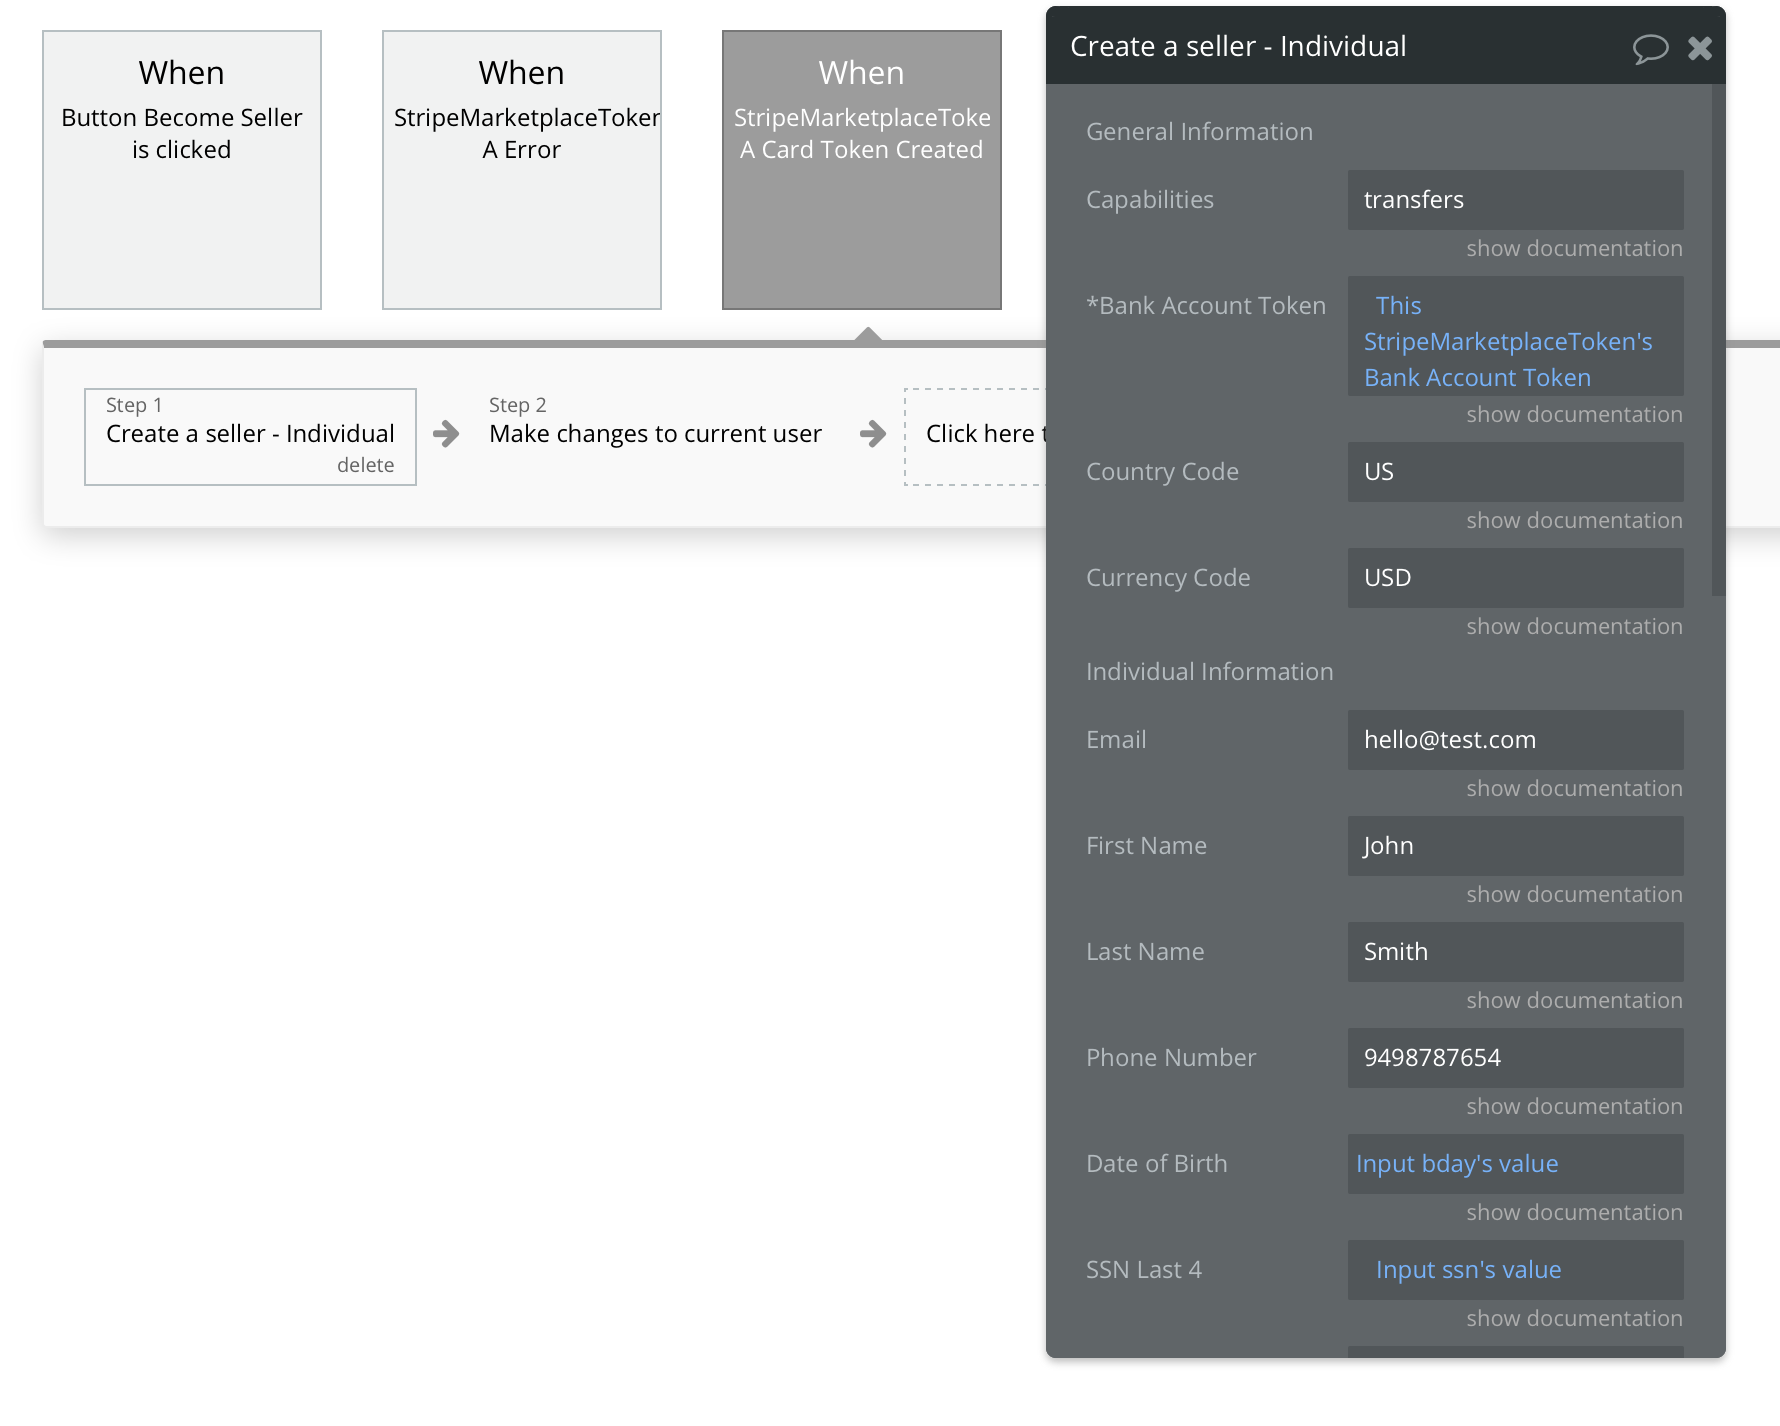
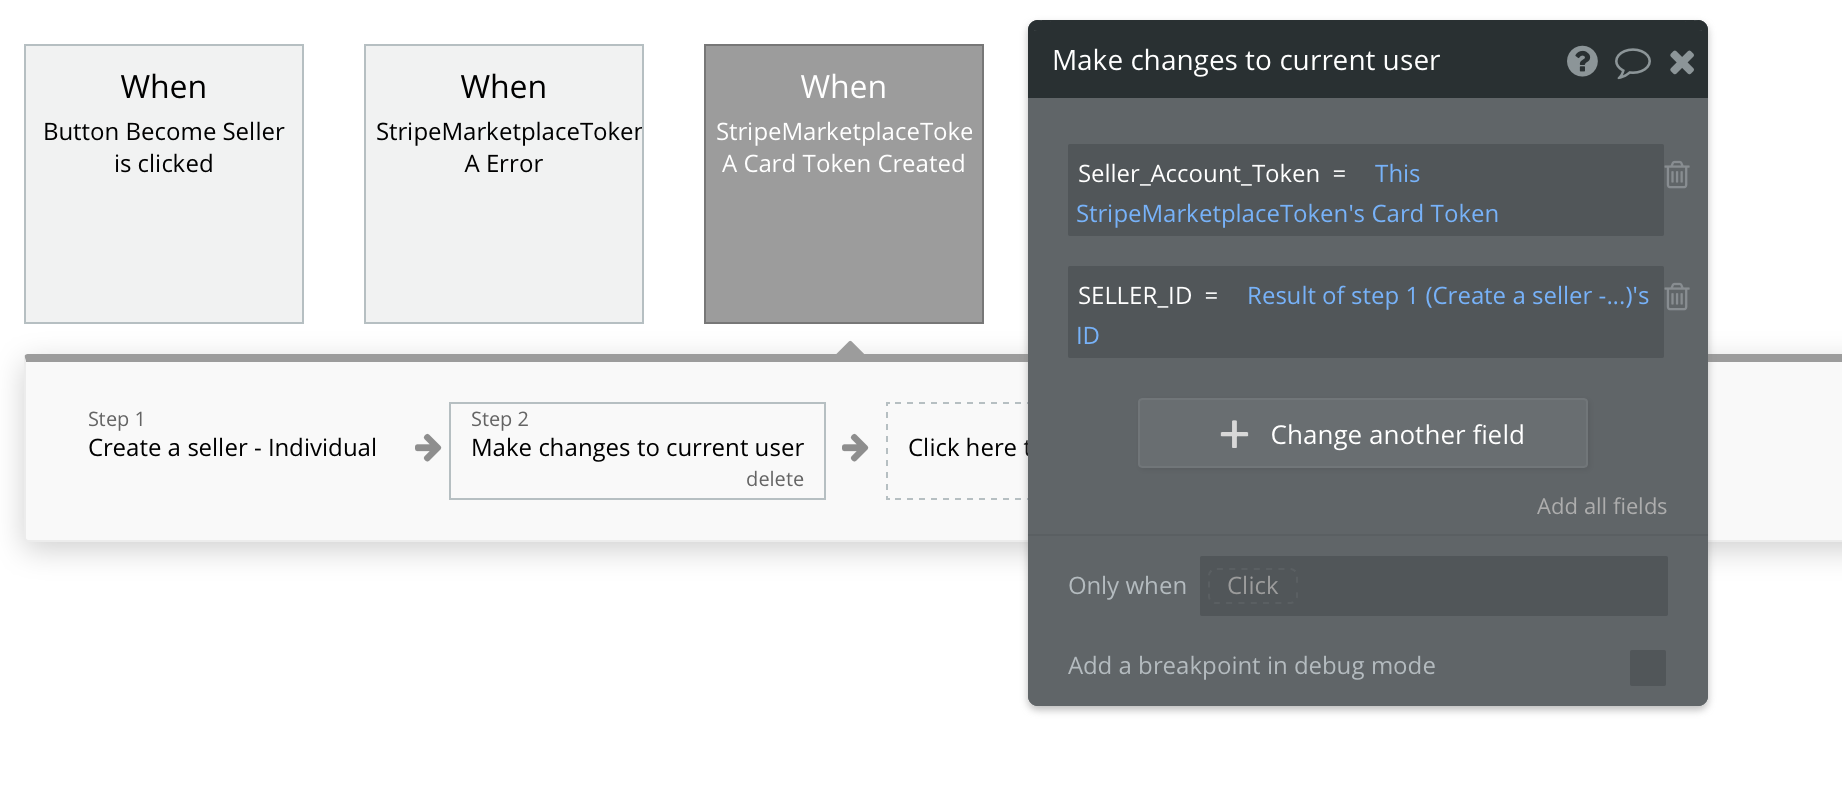
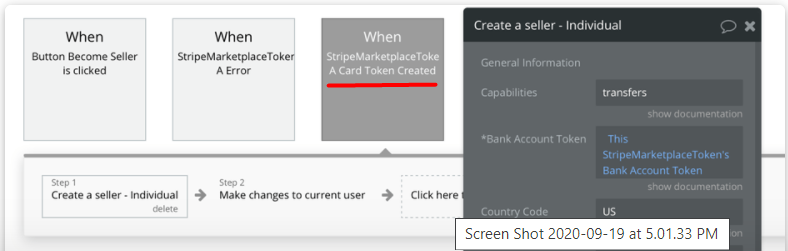
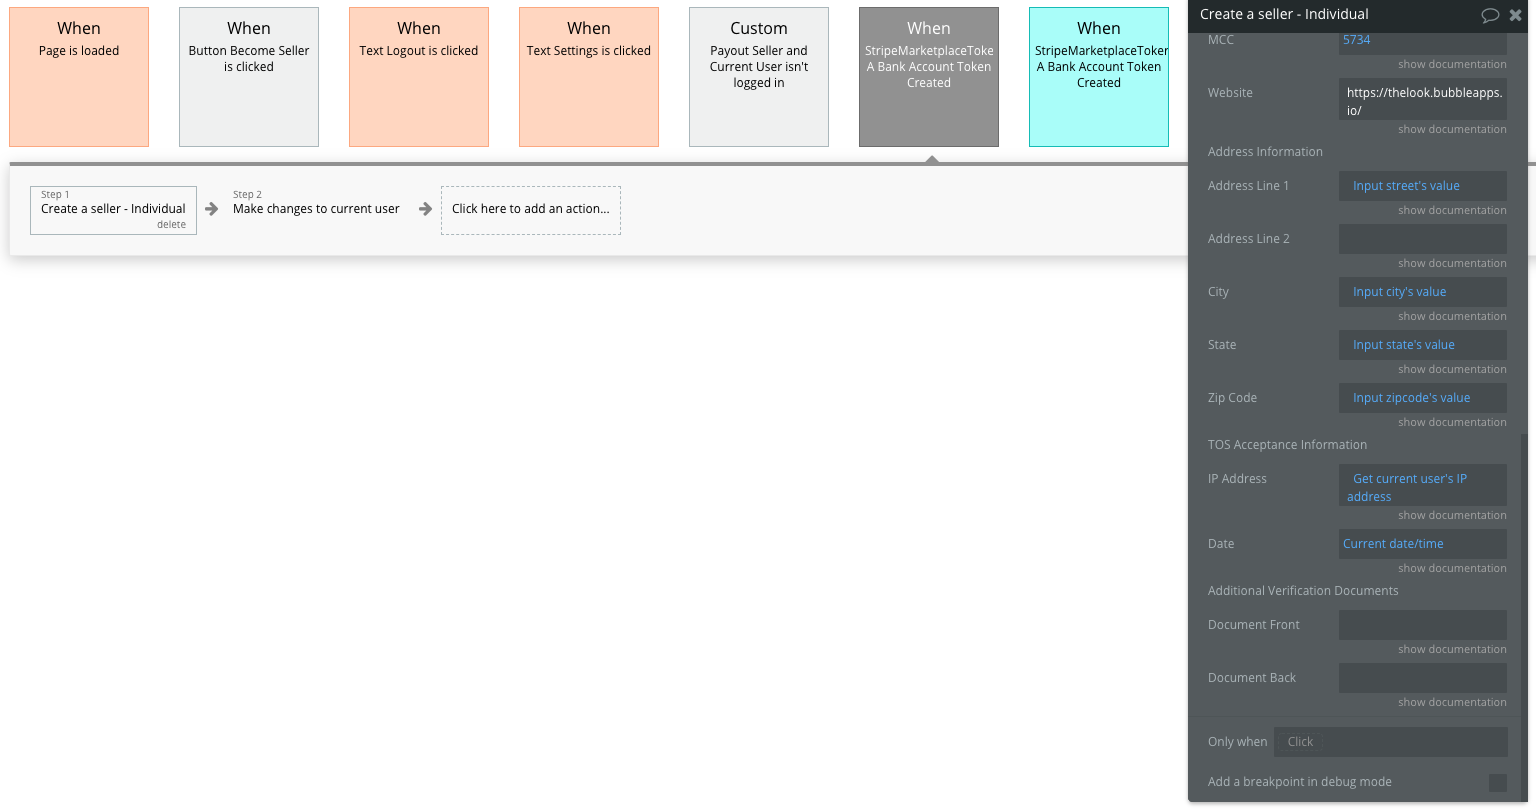
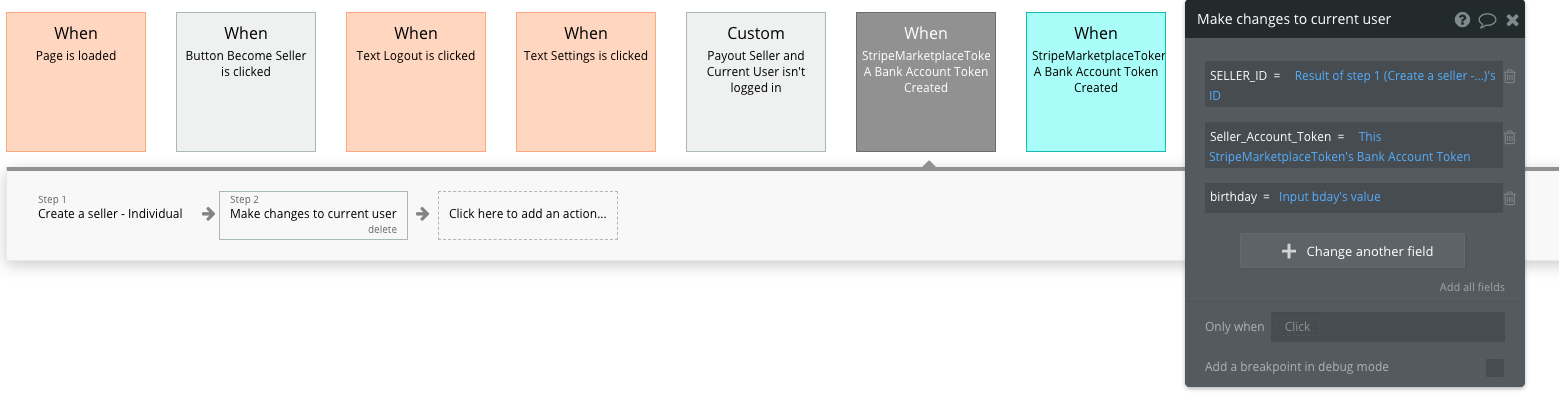
Step 2: StripeMarketplaceToken A Bank Account Token Created → Create A Seller - Individual → Make Changes to Current User


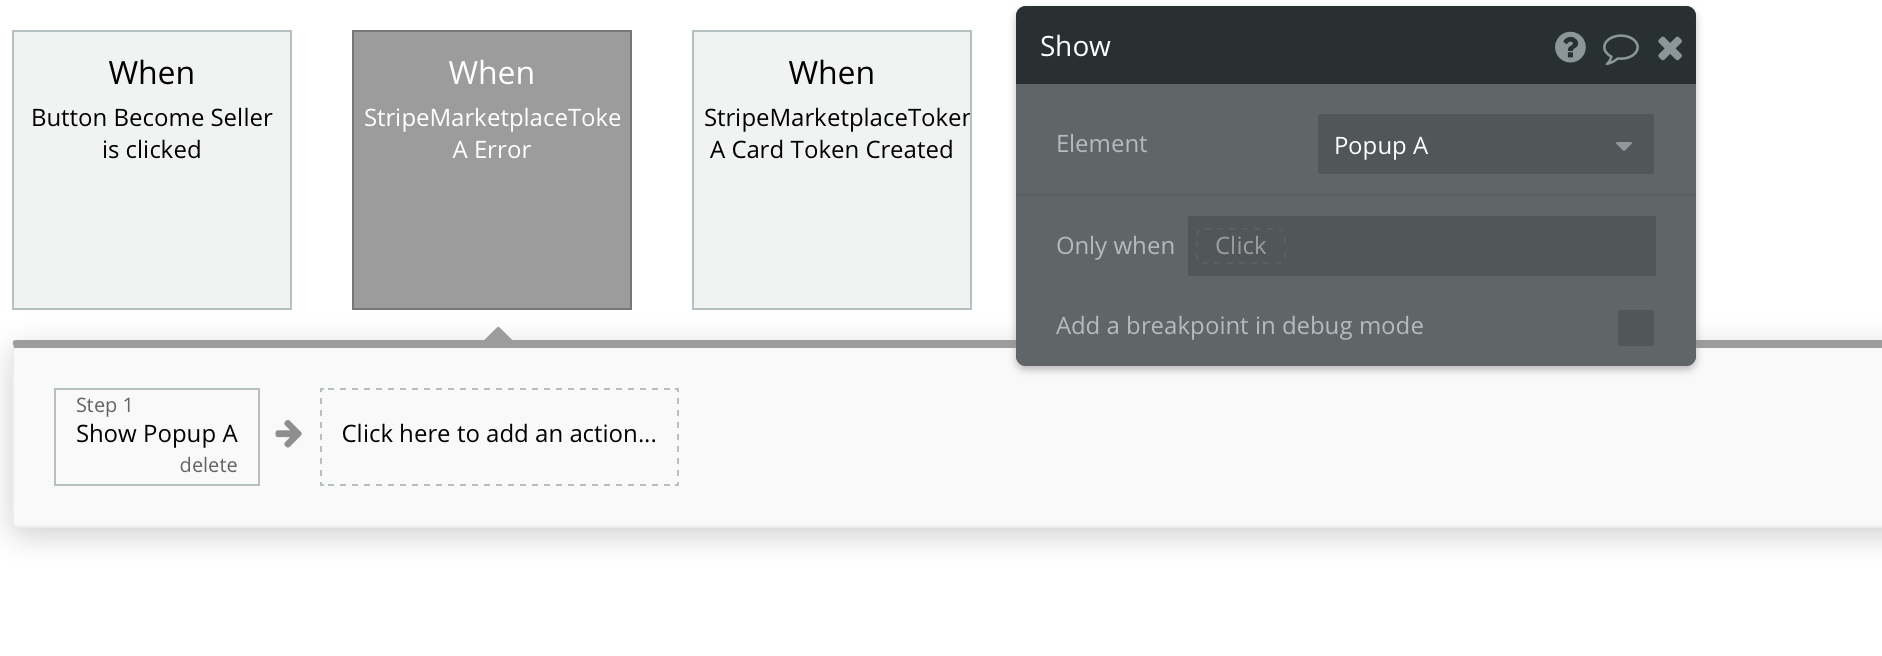
Step 3: StripeMarketplaceToken A Error → Show Popup A

I have been checking each step in the preview and trying individual steps without the others and this is what I have found:

  • The token creation no longer has an error associated with it because I fixed my API key to say Bearer in front of it. However, nothing is created because the Token is empty. It’s not an error though because I have a workflow to show a popup if the Event: StripeMarketplaceToken A Error occurs.

  • None of the actions work under the Event: StripeMarketplaceToken A Bank Account Token Created. I have tried saving the created token to the Current User’s data field: Seller_Account_Token but the field remains empty. Originally, when I try to create a seller the blue loading bar at the top of the page loads very slowly until it ultimately never finishes loading.

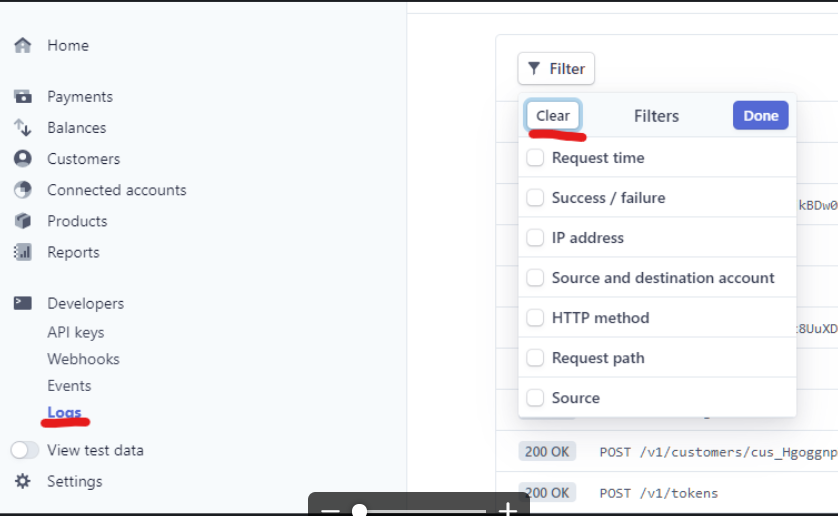
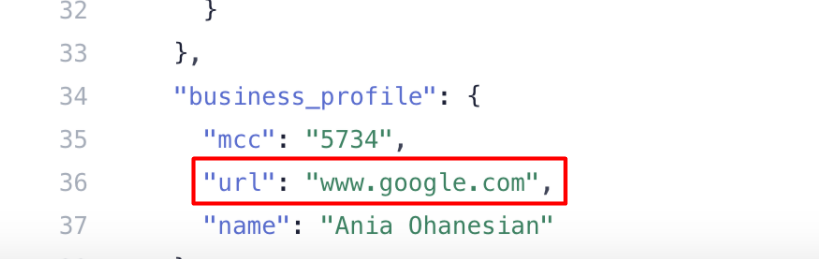
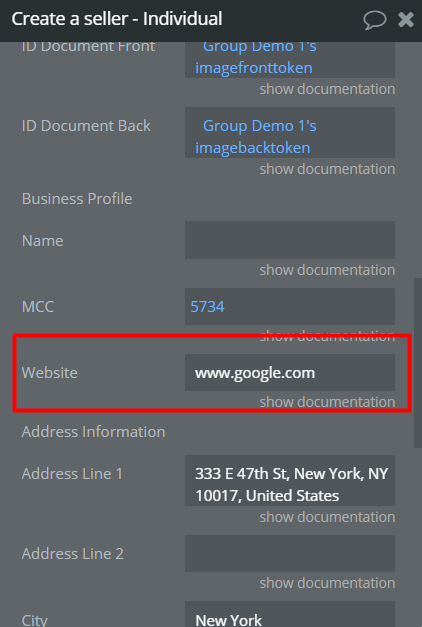
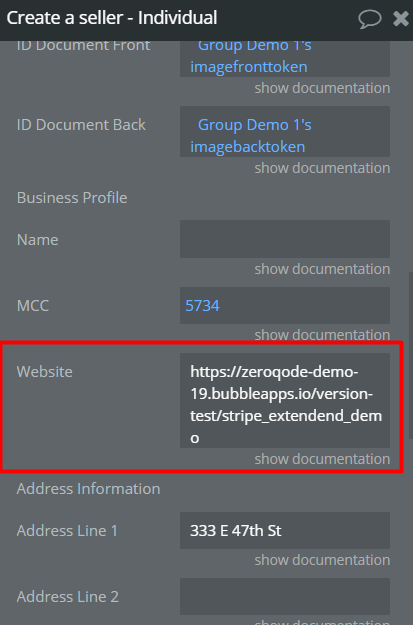
I see this same issue occurring on your demo page stripe_marketplace since this is where I went to follow instructions. Attached is a picture of the blue loading bar loading indefinitely… In contrast, your other demo page stripe_extended_demo does work! As far as I can tell, you do pretty much the same steps in both versions but one works while the other doesn’t?

I don’t know how to give you access to my editor, so if you need it please let me know how to.
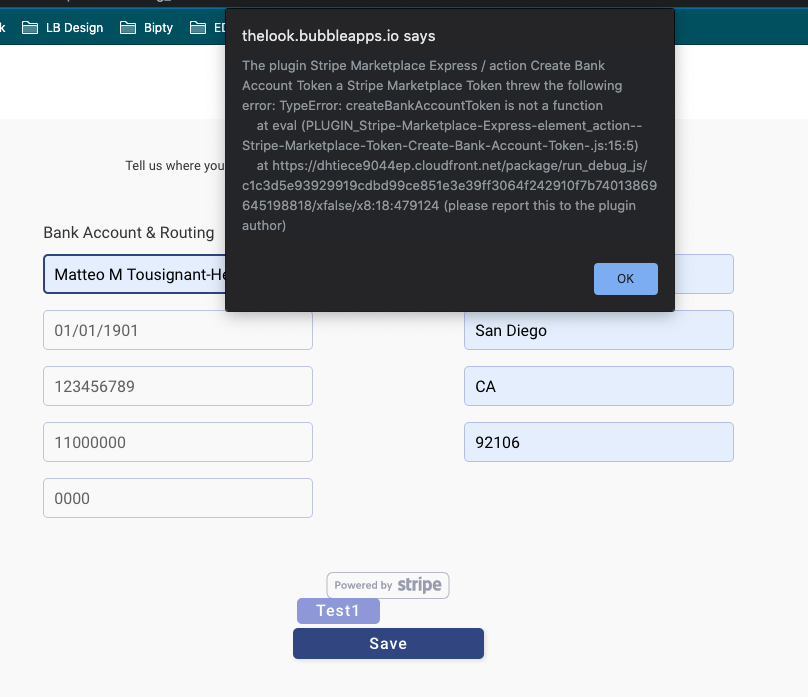
Edit:

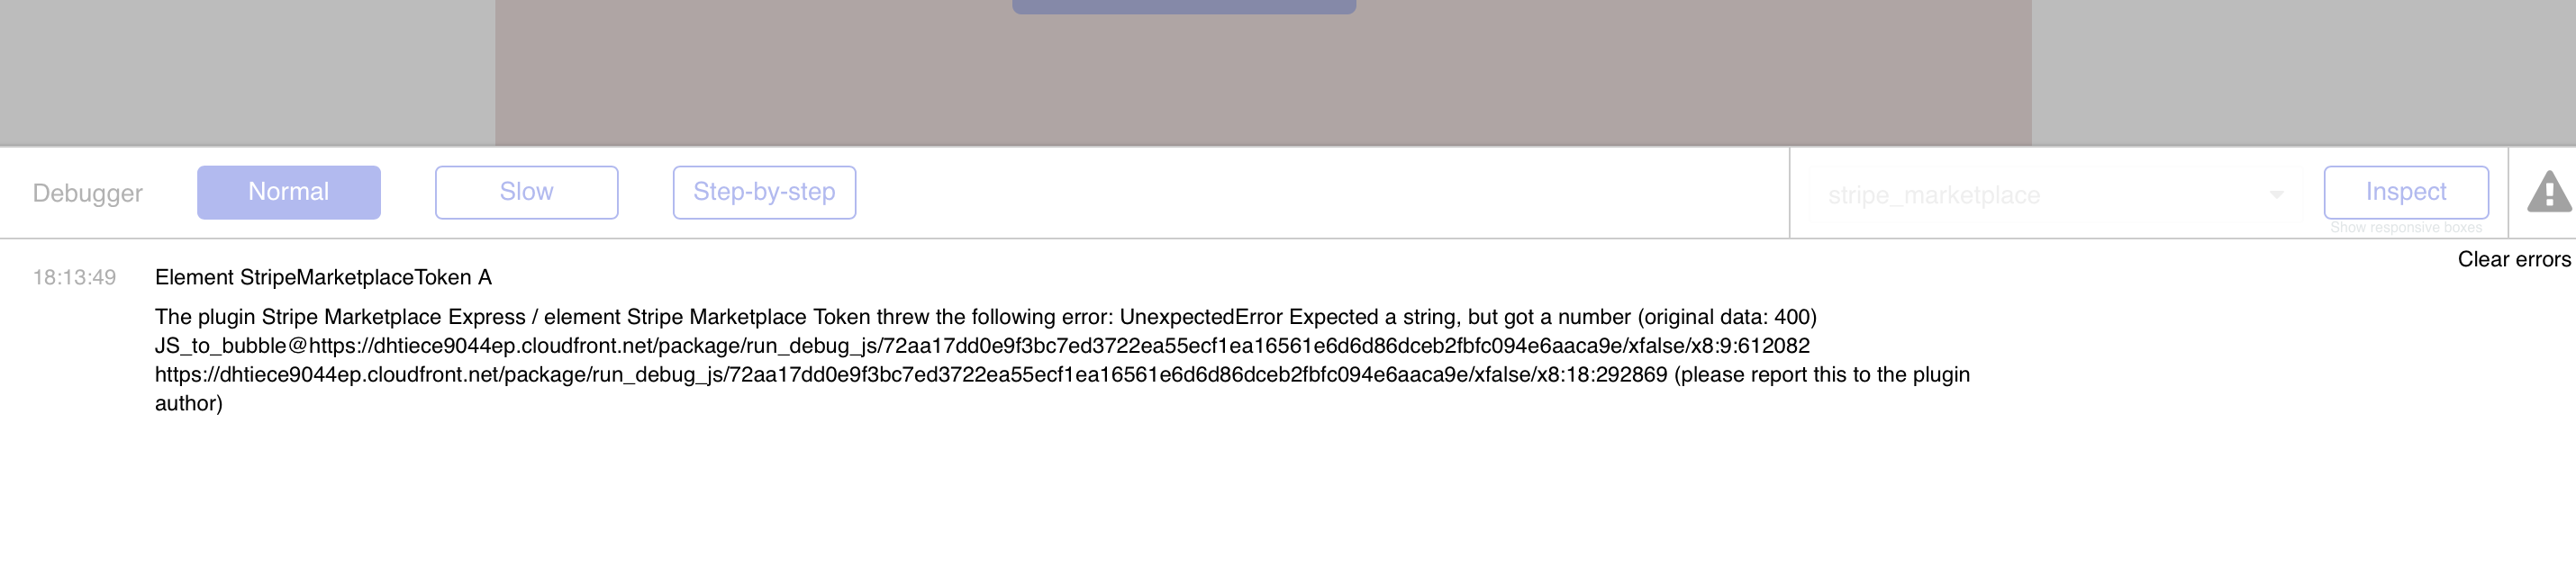
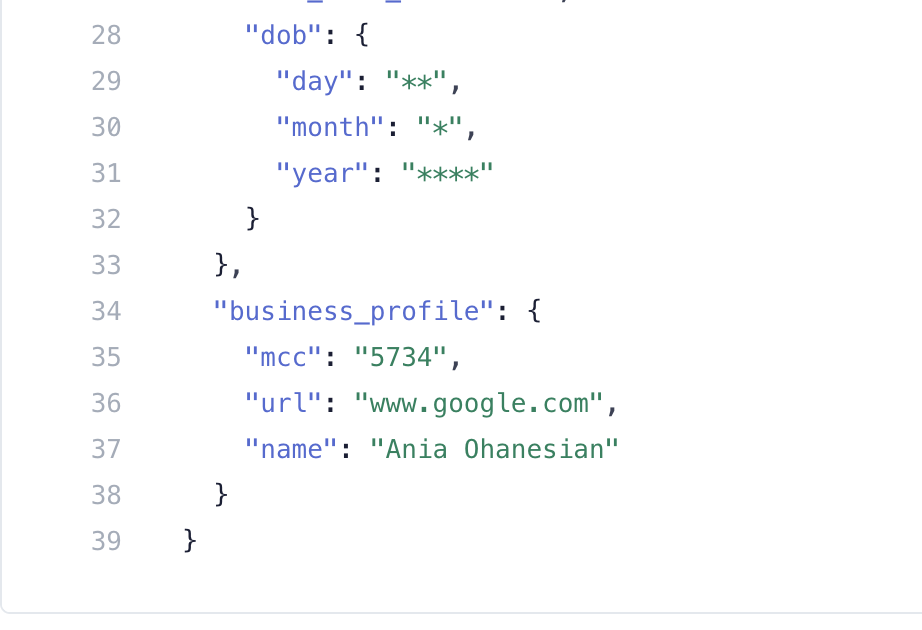
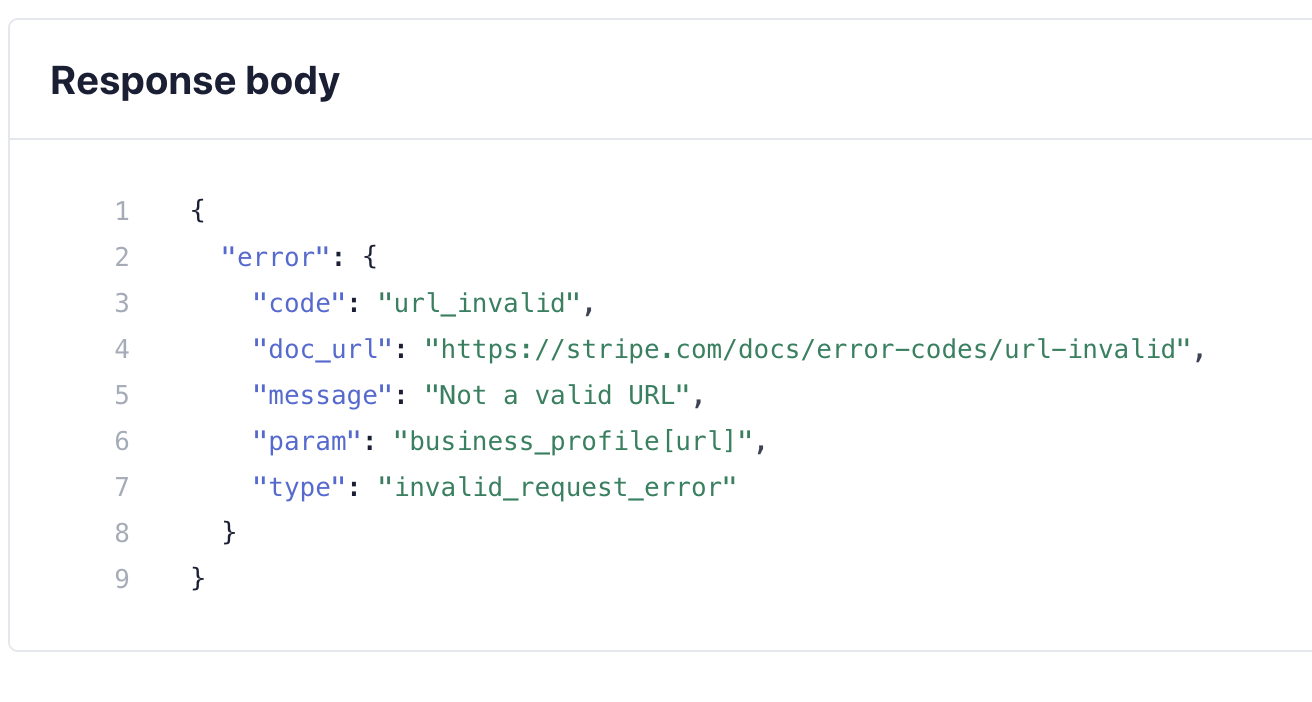
And now…this error is occurring:

Hi, @aniaohanesian!
Thanks for reaching out!

Let me, please, carefully investigate your request. As soon as I have the relevant info, I’ll get back to you asap. Thanks for the patience :pray:

Best, Julia.

Hi, @aniaohanesian!

Investigating your use case, I found out that you have used an action- Create a Banc Account Token, but in the action Create a seler- individual, use a Card Token Created.

So, please make sure that you’re using the right token in the workflow when create a seller- individual action is triggered.
Also, as a hint please make sure that Stripe Token element is in the group with the input elements. After that, please try to hit the button Become a Seller again and verify if the issue will appear in the Stripe dashboard, tab Developers- Logs . Note: uncheck all the checkboxes in the filter.

If you face the issue, please make a screenshot with the error.

Looking forward to hearing from you!
Best, Julia.

1 Like

Hi @Julia,

Thank you so much I can’t believe I missed that! My token works now, thank you!

I’m still running into the same blue loading bar issue when creating a seller. I looked at the logs on Stripe and it shows that the token was successful but the creating a seller has an error:


This is my current workflow now that I have fixed the token type:

Please let me know what I can do to fix this issue, I really appreciate your support!

Hi, @aniaohanesian!

Things happen :slightly_smiling_face: Glad that you have managed to solve this :wink:

According to your screenshot, there is an error because of the wrong URL


Replace this URL from the action Create a seller - Individual

and paste, for example, the URL of your app like here. Note: the Url should be indicated with https.

Hereinafter, would be better to explore the editore of our new Demo page as a reference. It is quite understandable and you always can peep the setting there to replicate them in your app and get a better experience :wink:

If you have any additional questns, do not hesitate to contact us!
Best, Julia.

Hi @Julia,

Hope you’re well. I’m running into another error (404) when trying to attach a payment method to a customer.


This my workflow:

Creating a session works and I retrieve a session ID and intent ID. But the minute I try to attach a payment method to the customer, it gives me this 404 error. I’ve tried it in the workflow at the end of creating a session, in a custom workflow with a trigger, and I’ve tried it on its own with just using the saved session/intent ID.

Here are the details of the attach a payment method step, I tried to follow the instructions in your documentation.


Thank you!!

Hi, @aniaohanesian!

I see, so, let me investigate this use case carefully and I’ll get back to you asap. Please be patient, it might take time due to the upcoming weekends. Thanks for understanding!

Best, Julia.

Hi, @aniaohanesian!

So, with regards to your question I have noticed that you have indicated the final step in the “Text Add Card is clicked” workflow - Trigger Attach Payment Method

Please, remove this step4 and once again check all the steps from the Demo page and try to replicate them and then give it another try.

Here are screenshots from the Live Demo where you can find the necessary setups.


Hope this helps!
Best, Julia.

Hi, @Julia

The stripe connect custom account is showing errors again. The error states it is occurring on the side of the plug-in.
Here is the error:

Screen Shot 2020-10-09 at 2.22.08 PM 
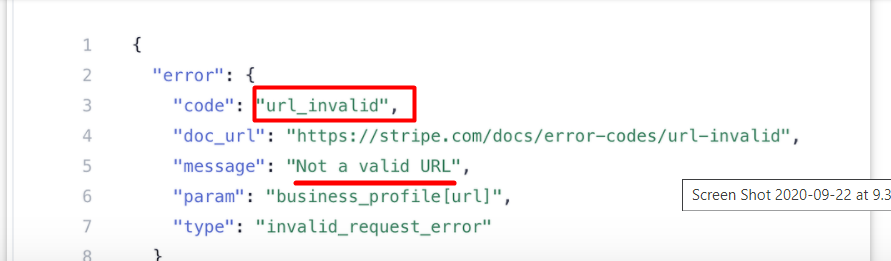
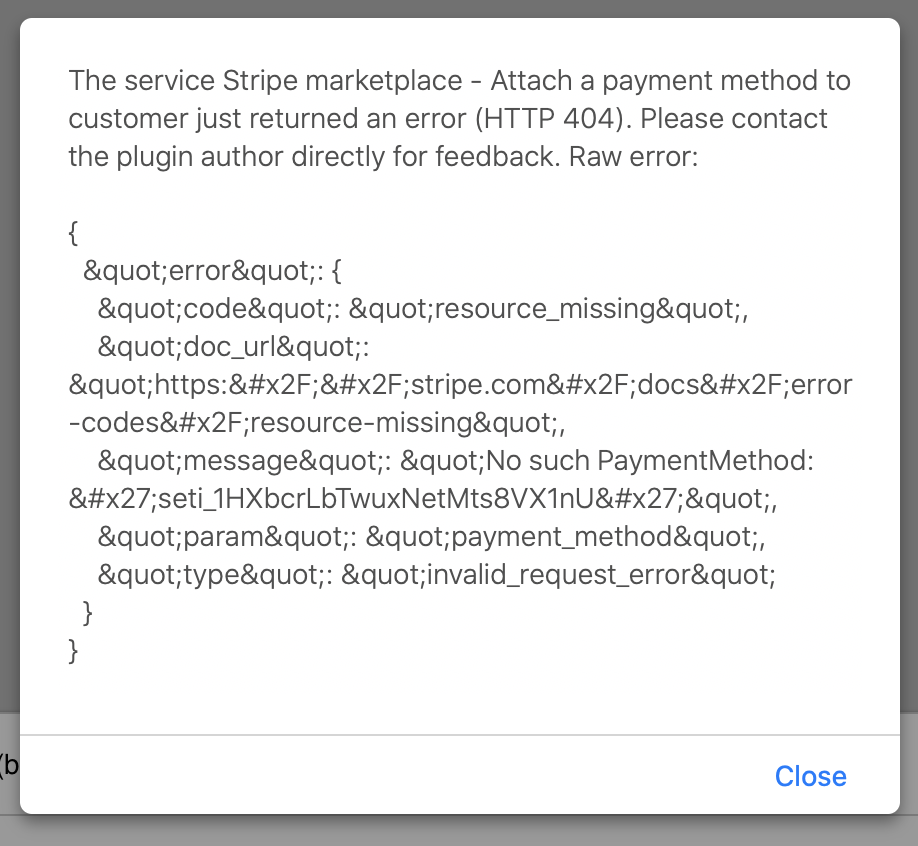
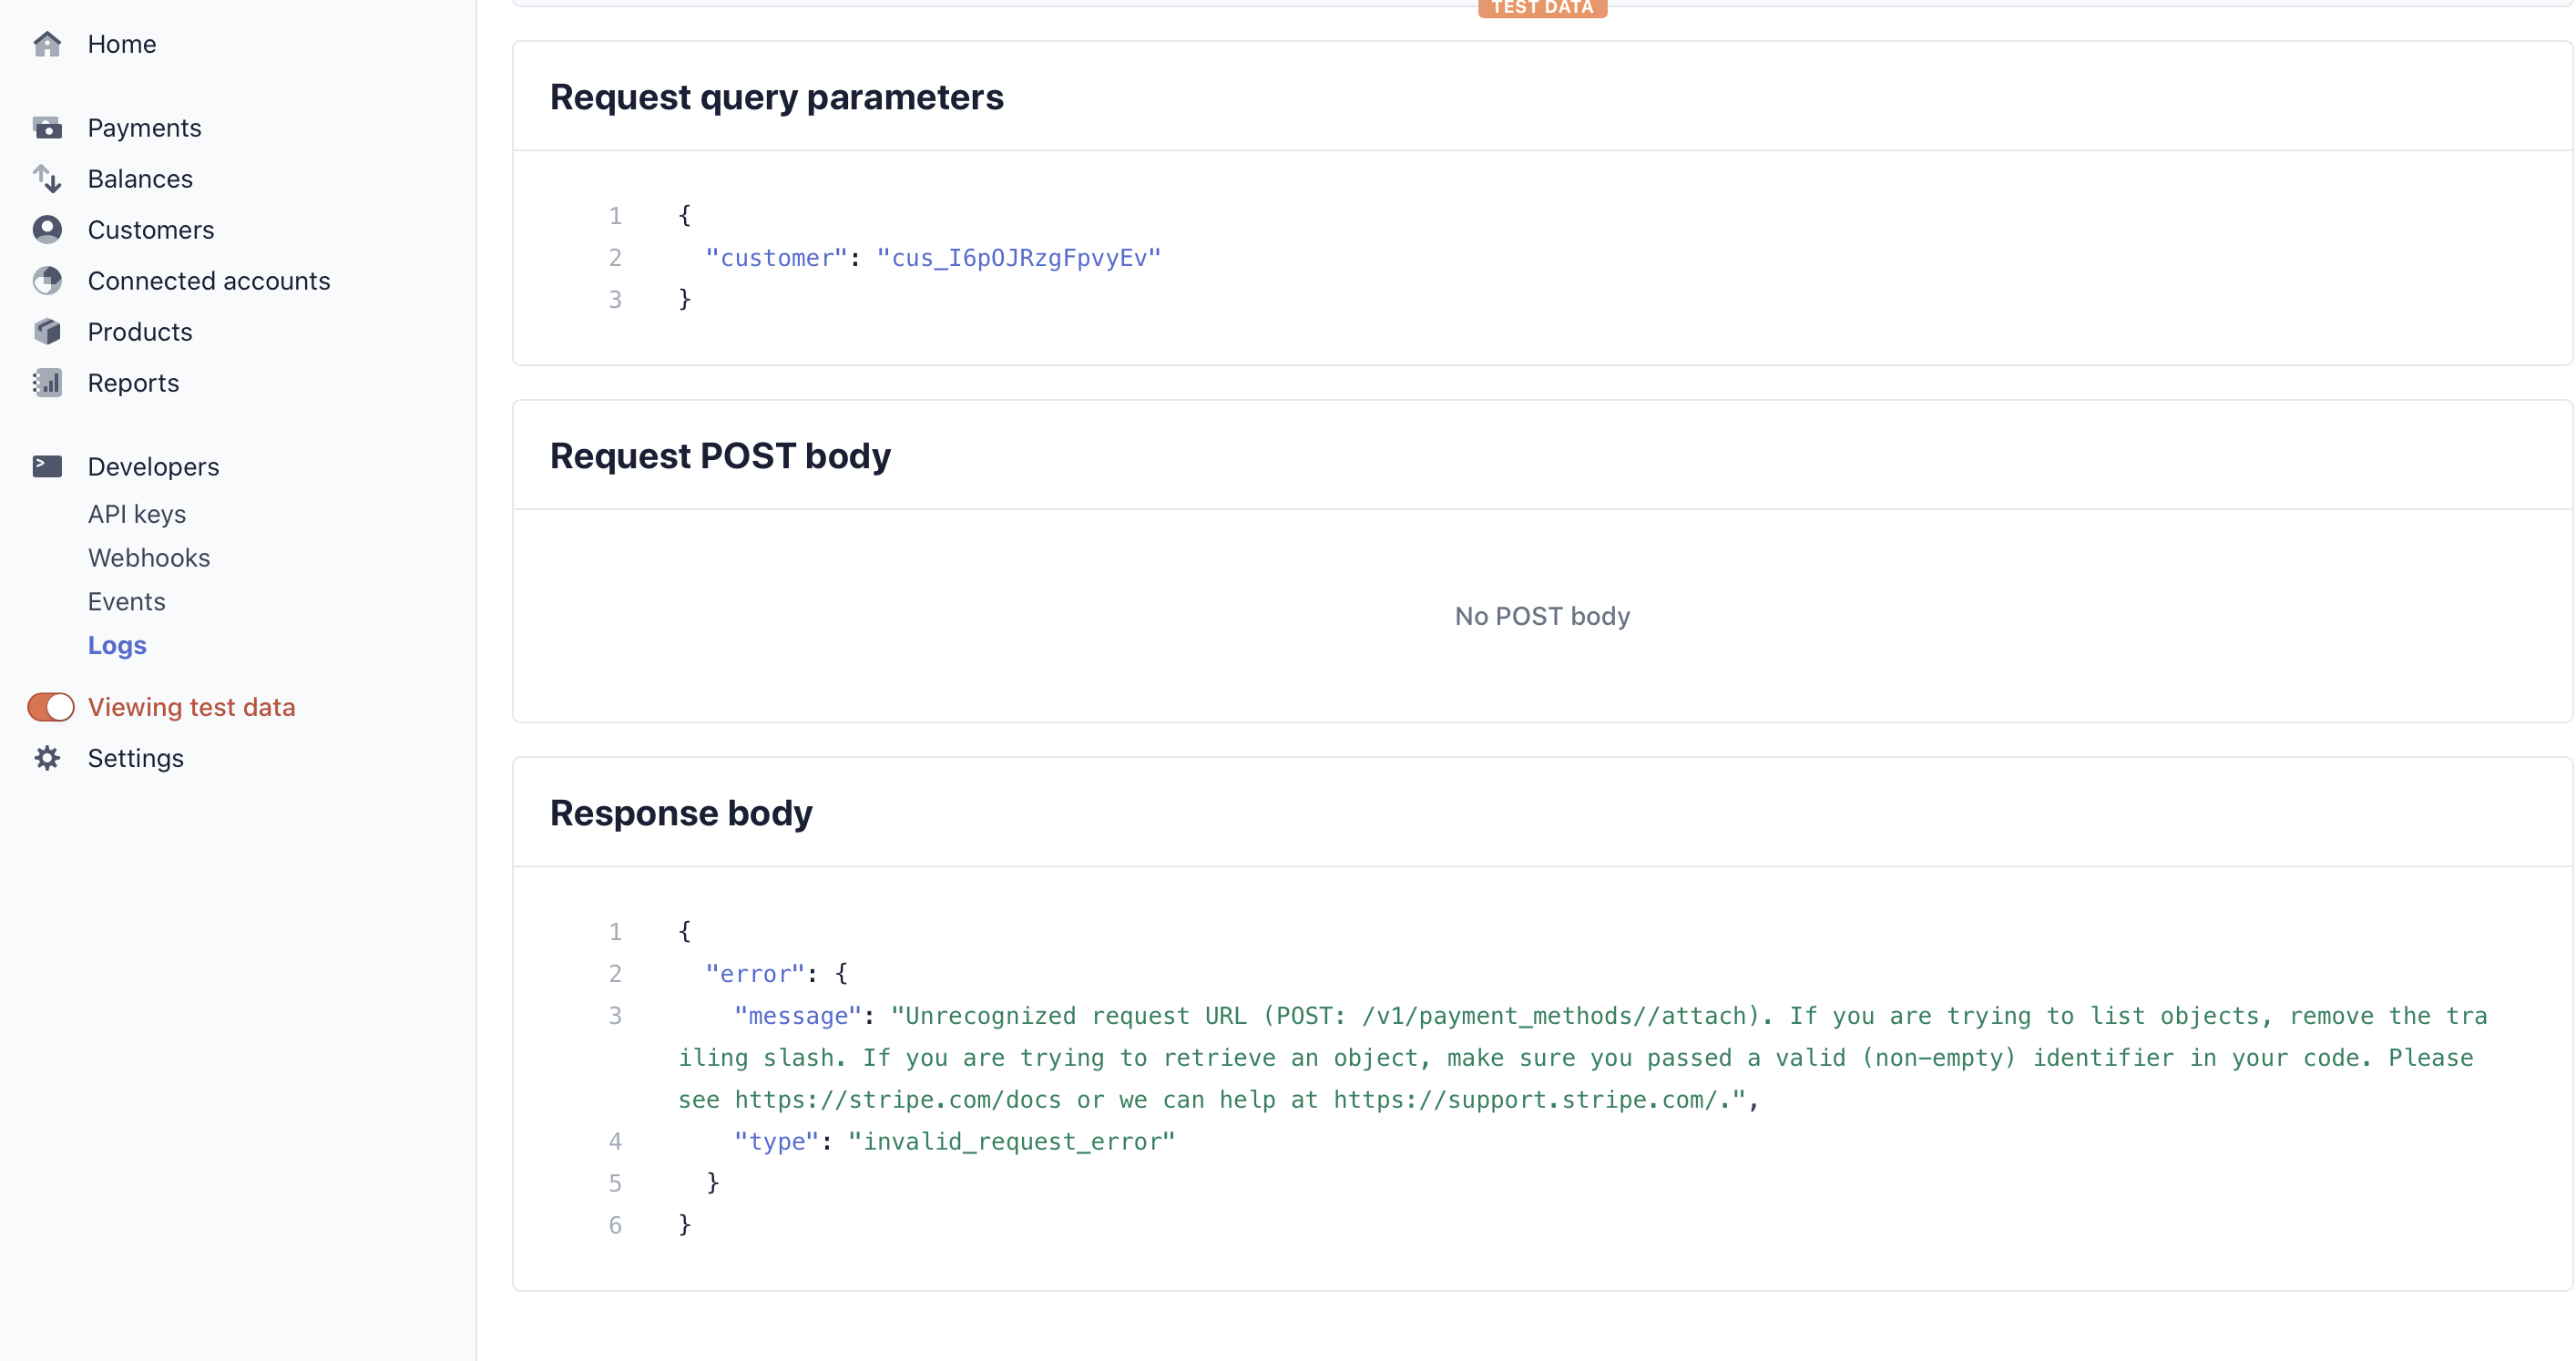
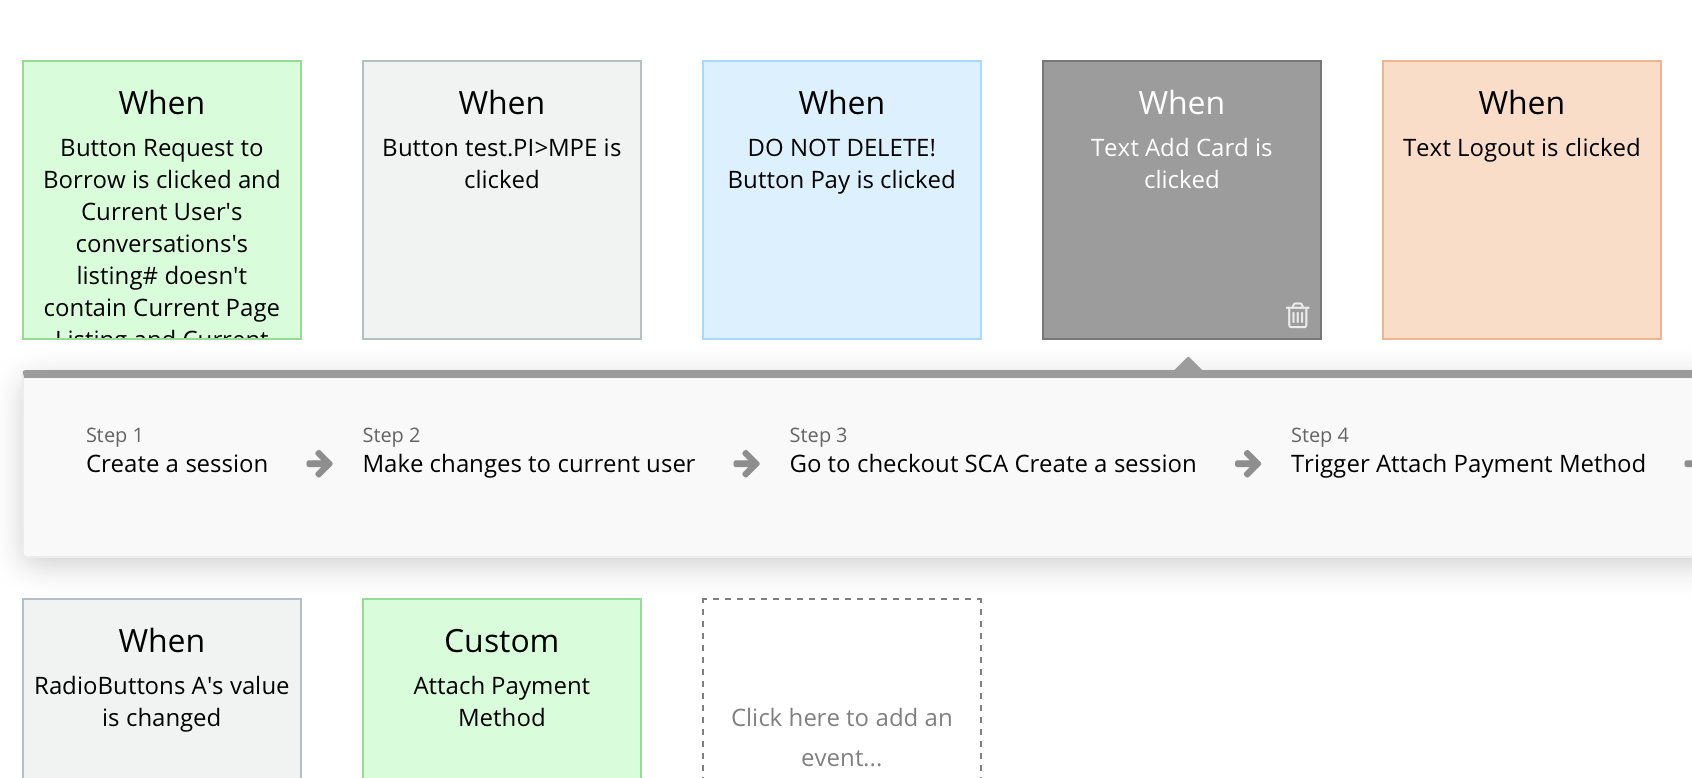
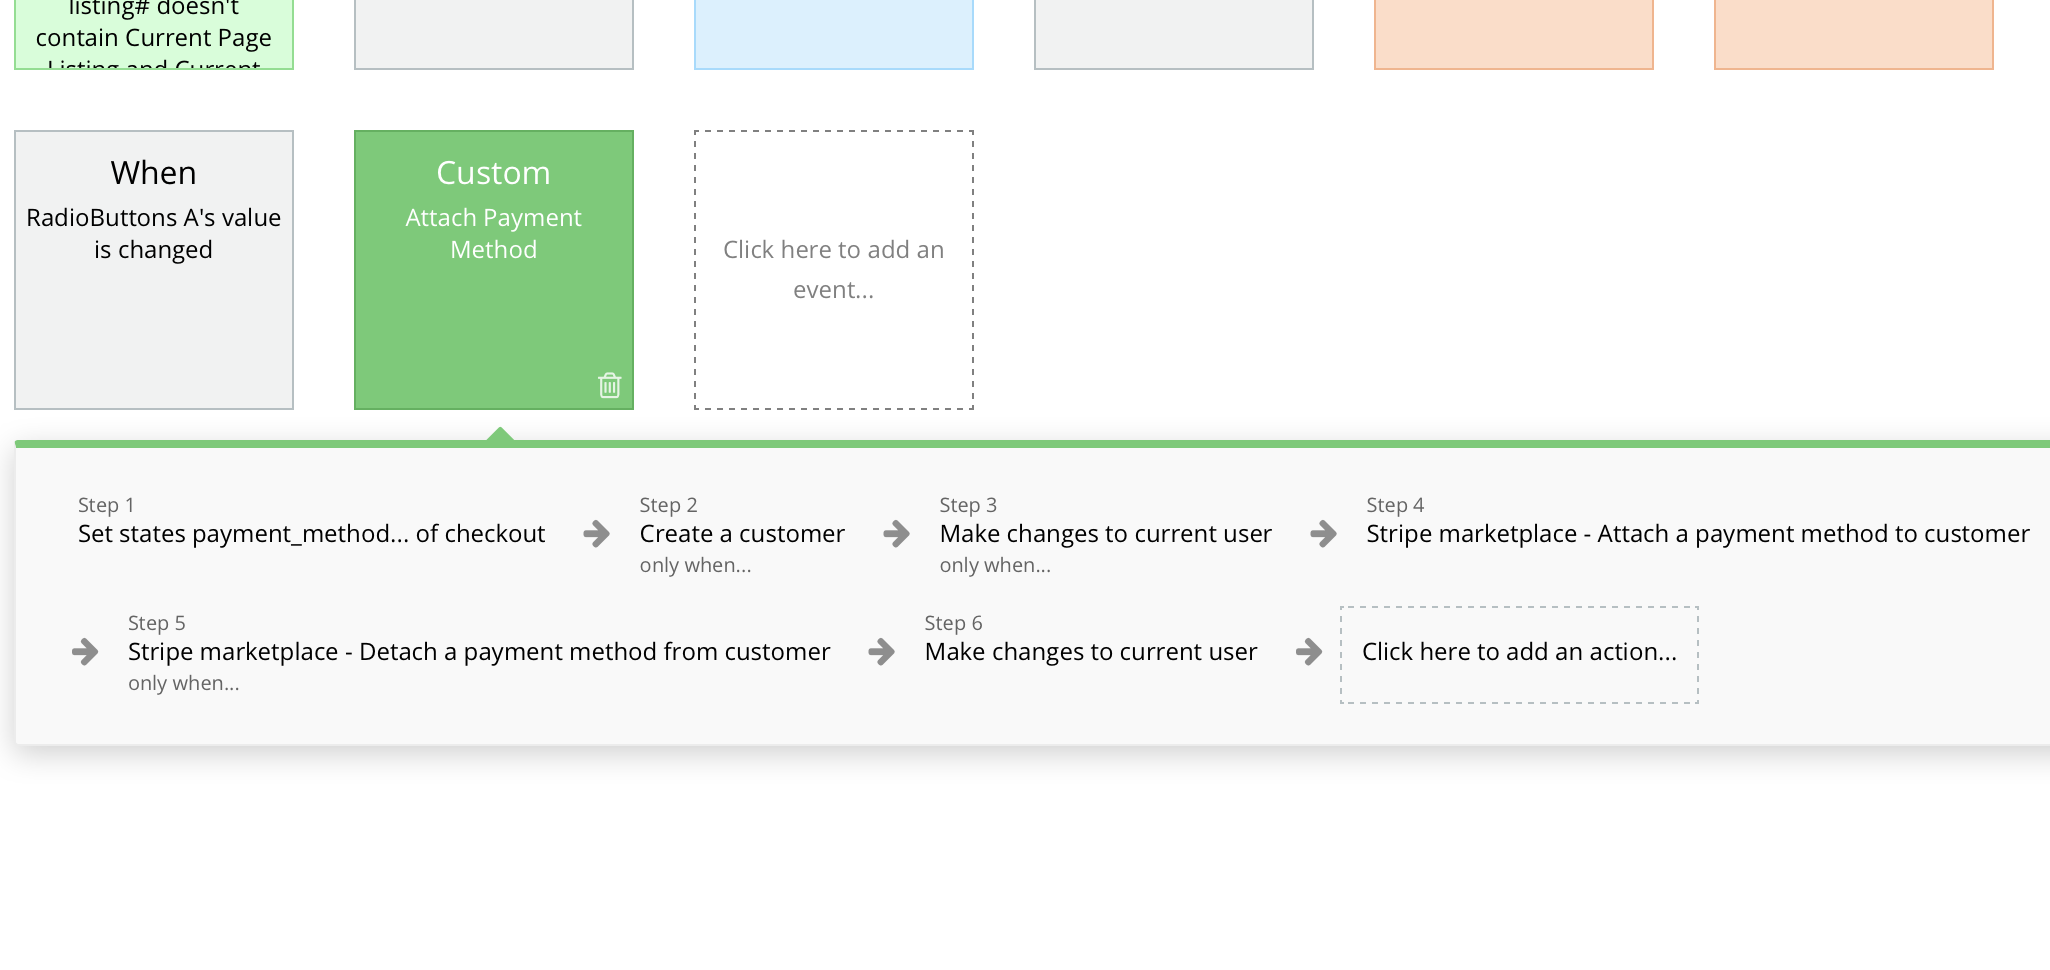
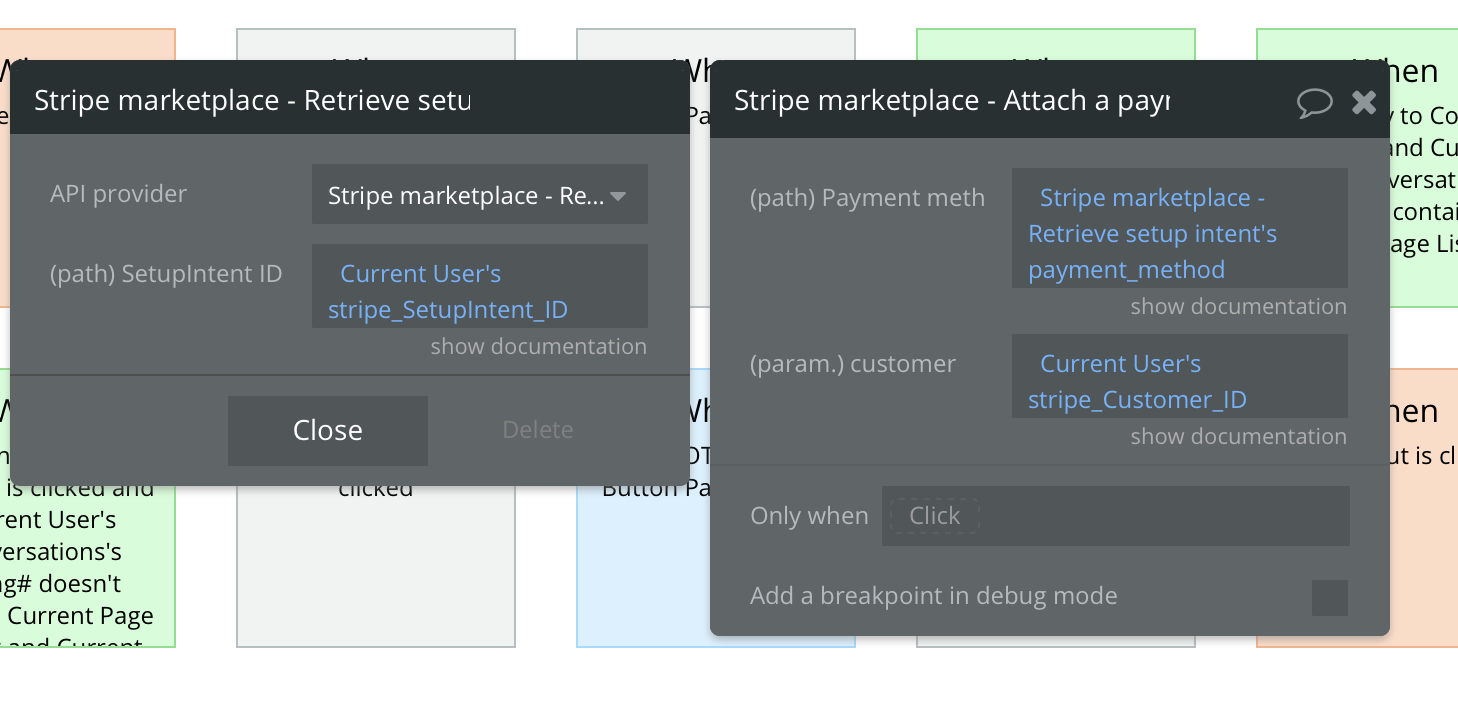
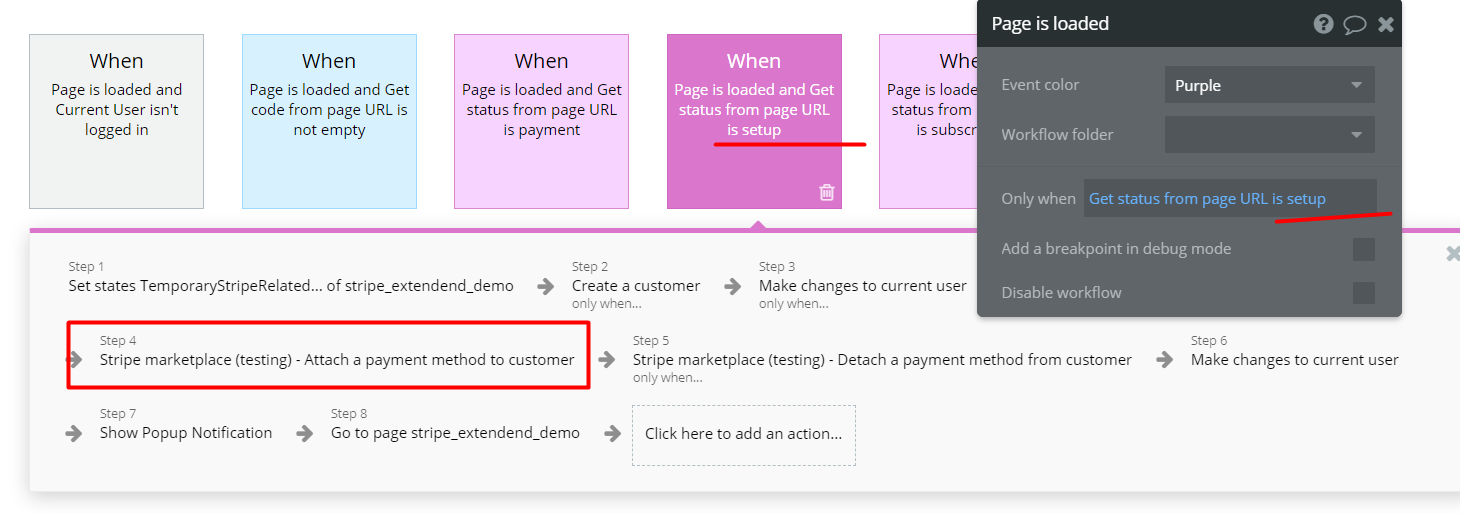
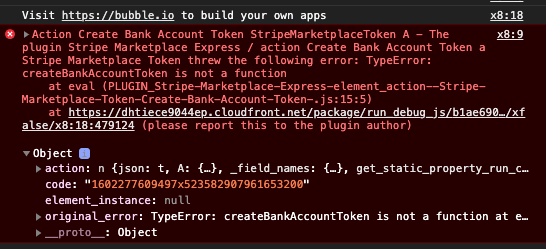
This is occuring from the workflow shown below. Please let me know if there is anything on my side that i can do.

Hey, @aniaohanesian!

Hope you are doing well!

So, please make sure that StripeMarketplace Token is on the same Group with the ‘Button Became a seller’ that trigger the action. Here is a sample of how it is set in the template

Hope this helps!
Best, Julia.

Thank you, I had it in the same group but I guess accidentally switched it to not be visible on the page load. That’s why I was confused because it was originally working and then stopped. Now I know why, thank you!

Hi @Julia,

I’m running into an issue with the Success URL and Cancel URL for Create a Session.
I would like the success URL to go to the same page as the cancel URL. I know that the URL needs to include “status=setup” and “status=fail”, but how would I manually add that to the URL? The URL for the checkout page is drawing on data from a previous page of the specific item, so each URL would be unique which is why I can’t use the technique in your demo page of just writing out the page and status at the end of the “Website Home URL”.

In addition to this above request, I’m unable to successfully Create a Session in general because no SessionID is being created. I assume there is an issue with my success and cancel URLS.

Let me know if this makes sense or if you would like access to my editor. I’m not sure how to give you access though, so please let me know how if you need it.

Hey, @aniaohanesian!

Things happen :slight_smile: 
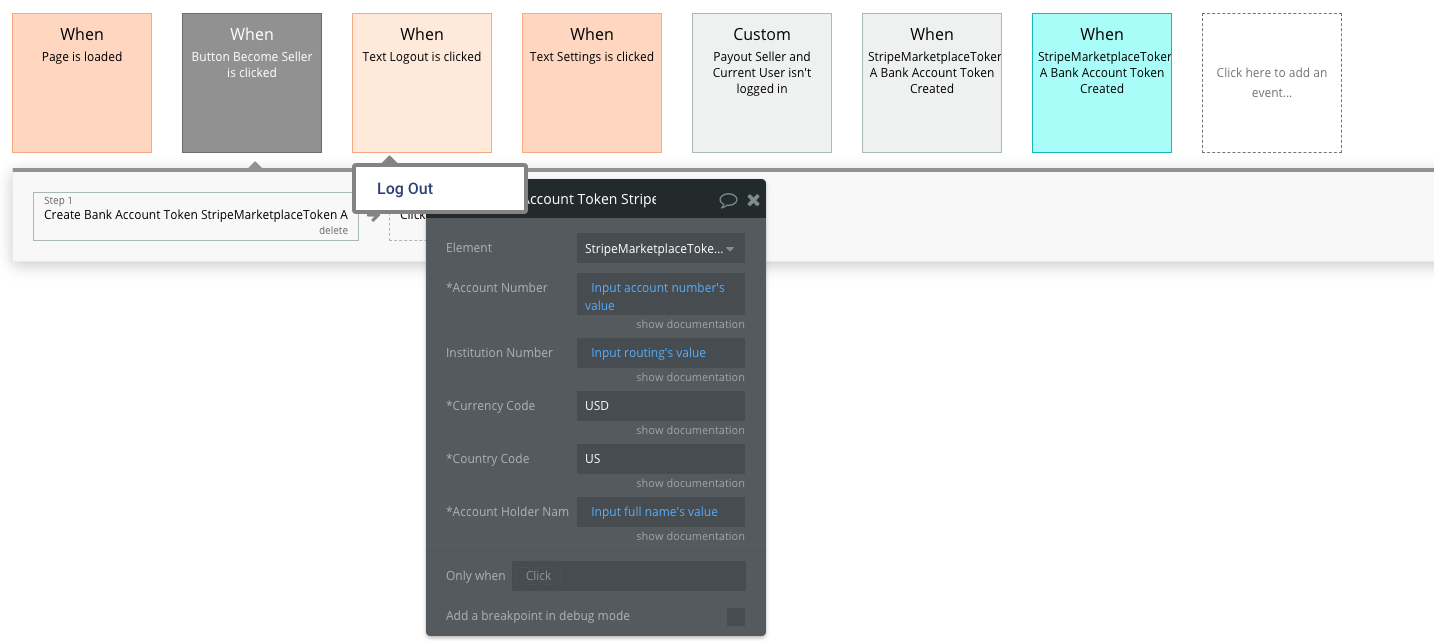
You are always welcome.

There is a possibility to add the unique URL in the filed - “Success URL field”. You can state the URL this way: Website home url + page name + /Current page product + ?status=name. But there is one preresquite- your current page product should be type - product. See screenshots as a reference.

Only in this case, it will work as you stated above.

Please, try to replicate all the settings from the Live Demo page and give it another try. If you face some troubles, please share a screenshot with an error that appearing after made actions.

Hope this helps!
Best, Julia.

Perfect! My issues are all fixed. Thank you so much!

2 Likes

Hey, there!

I am so glad to hear that all is working on your side :slightly_smiling_face:

If you like our plugin you can rate it by going to Plugins tab in Bubble editor. Find the plugin by name and it give it as many stars as it deserves. :slightly_smiling_face:
The more feedback we get, the more motivated we are to make things better in Bubble. :slightly_smiling_face:

Also if you have any questions, please, let us know!
Best, Julia.