Services Plugins FAQs

Stripe Plugin Help

I purchased the marketplace app and followed the steps on the documentation page at Stripe Marketplace Express Plugin - Zeroqode Documentation as well as looked at the demo of this plugin but am getting the following error.

Not sure why it’s a token error as I have this already set up

Would love any insights, thanks

Solved by adding “bearer” in front.

Would love some help on a new issue related to this plugin.

I can see the charge customer workflow, but can’t see where I can fill in the data for a user that has saved credit card info from an earlier step? Does this go inside after “create a customer” or where?

Thanks

Hello @stusim,

Could you please let us know what exactly you are trying to achieve. Sharing Screenshots of the workflows or providing any additional details would be great. This will help us to understand better your request and provide a solution.

Best Regards,
Alex

Thanks @alex.grimacovschi ,

My flow has three steps

Here my Buy Now Button opens up a stripe popup

Simultaneously, a token is created.

Once the popup has been filled out. That card is then attempted to charge.

Thanks in advance for your help,

Hi there @stusim,

Thank you for your provided screenshots. We are investigating the issue and will reach out to you with a solution asap.

Best regards,
Alexandru

Hi @stusim,

To solve the issue, when you press the button it should convert to a token card. Afterwards, you have to create a separate workflow “When a token card was created” where you create customer and then save Customer ID and Card ID to the database.

Then use these IDs in your charge calls. Before using “Seller charge a customer” call, you have to use “Link customer with seller” first, and from the obtained result you should get the ID of payment source.

To make things simple, please check again the plugin documentation and follow all steps to make sure configurations have been done properly, especially pay attention to the moment when adding a card. Also, check demo app here https://zeroqode-demo-19.bubbleapps.io/stripe_marketplace and the editor here Zeroqode-demo-19 | Bubble Editor to verify the settings.

Hope it is helpful!

Best regards,
Alexandru

1 Like

creating the same as the plugin create a seller -individual and I need help to understand the group avatar image is dynamic. How to set the front image and back image as background?

to make workflow with front image token when pictureUploader front’s value is changed, what state type to choose?


same her to make seller id, what state do I pick to make the workflow correct?

Hi @AlexaAnne,

Let me help you here.

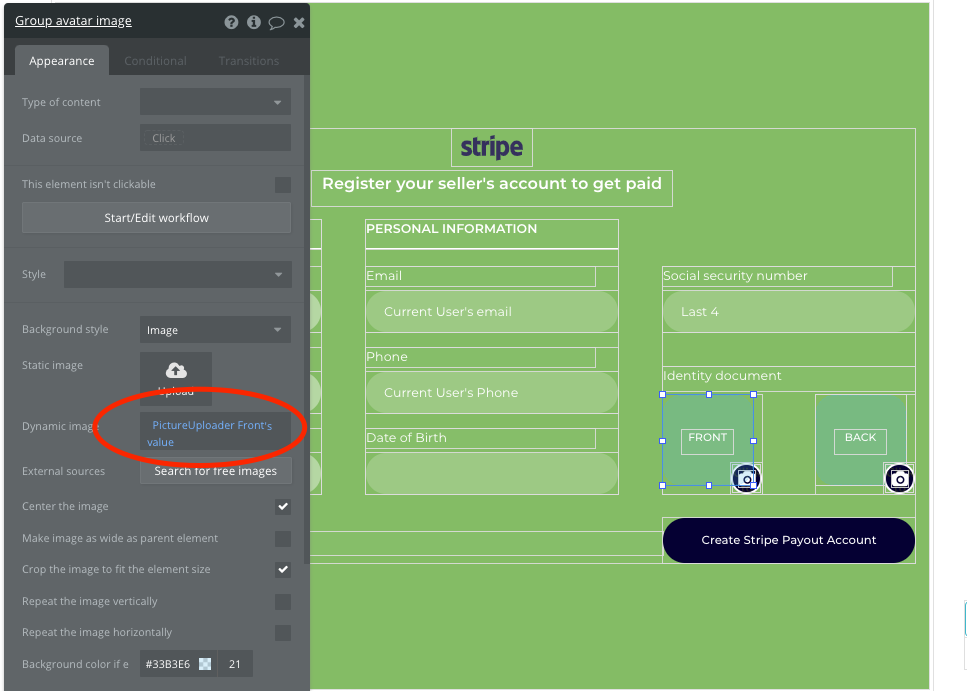
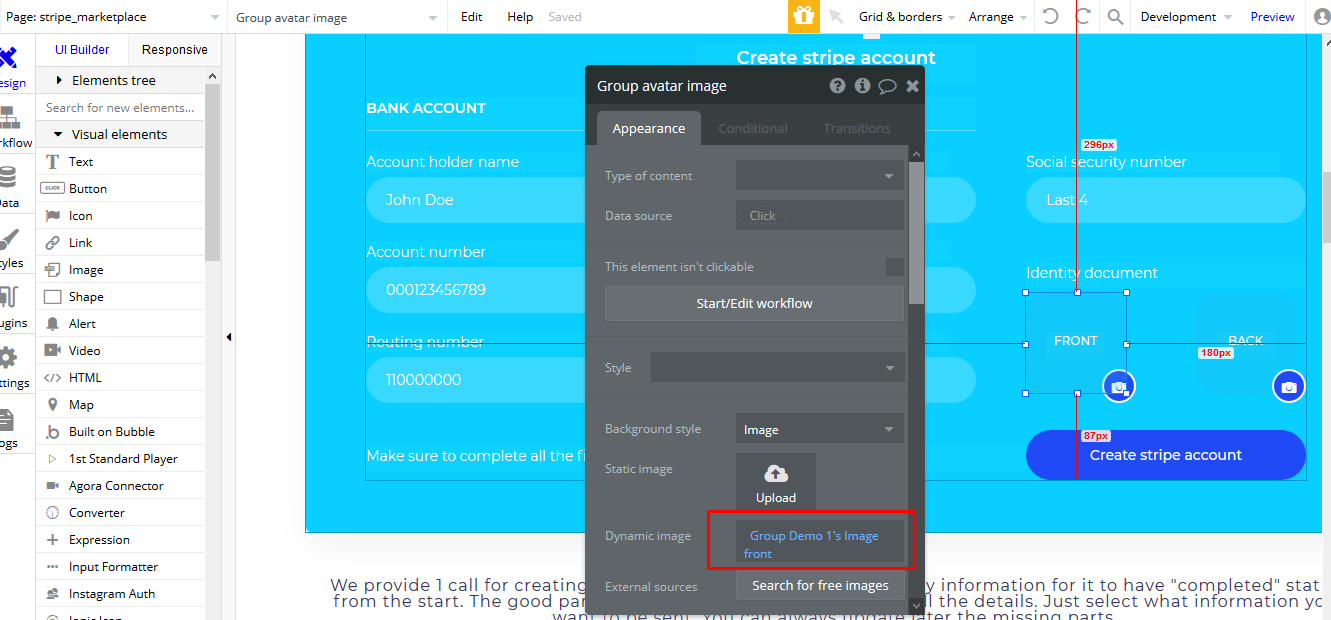
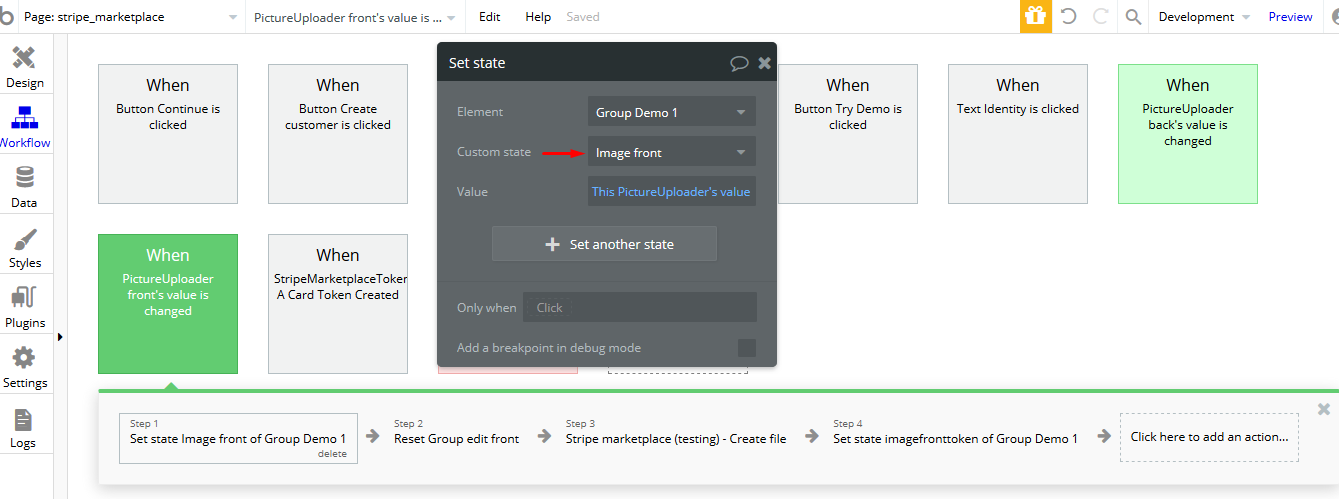
So, for the Group avatar image, the Dynamic image has to be set this way:

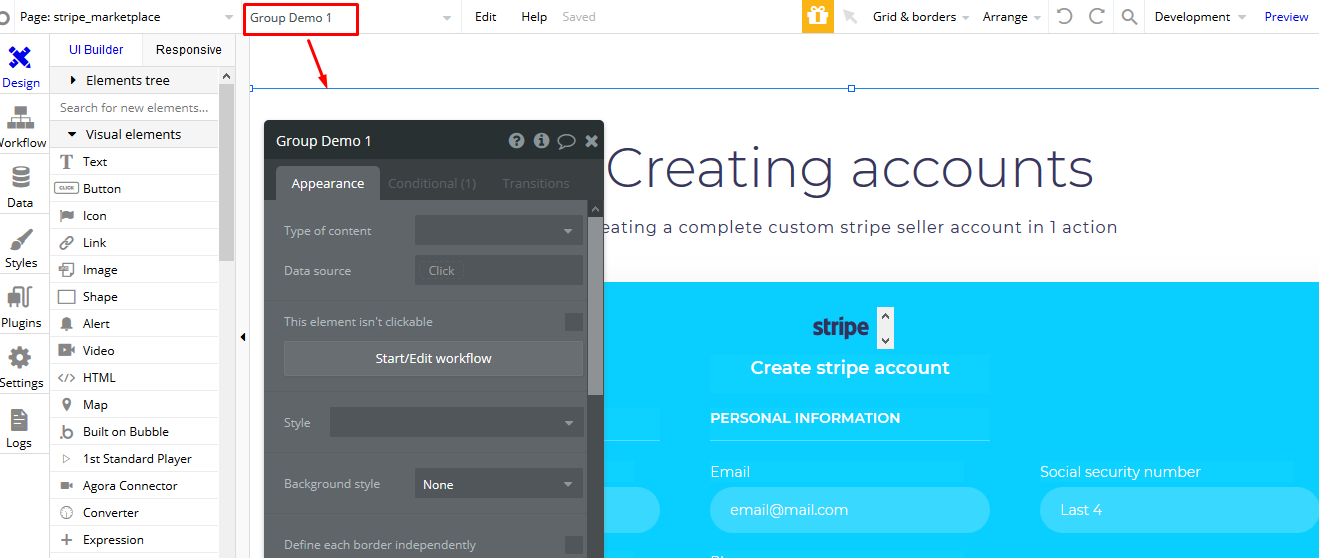
Where the Group Demo 1 is the whole group where all other elements are placed within:

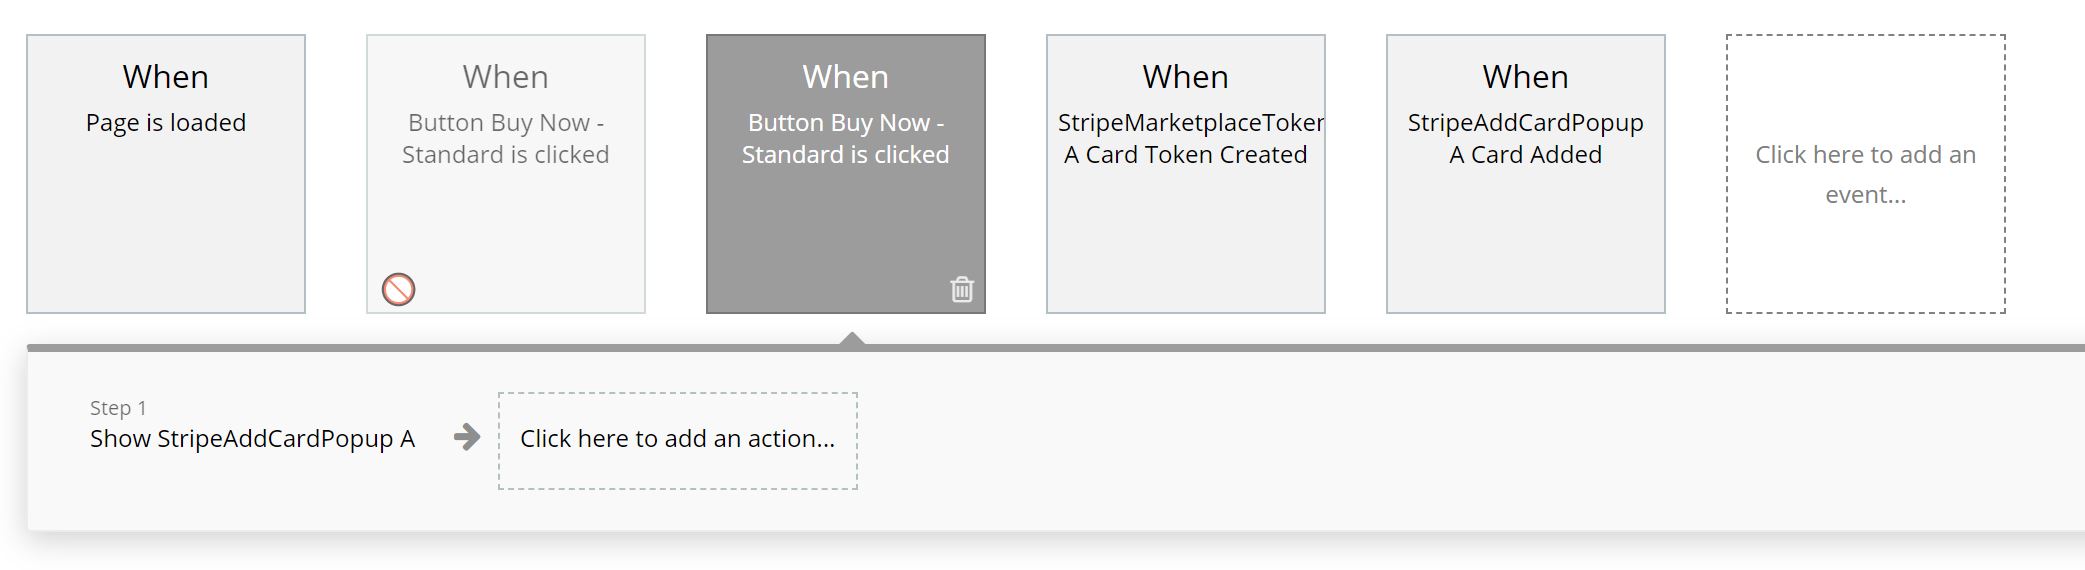
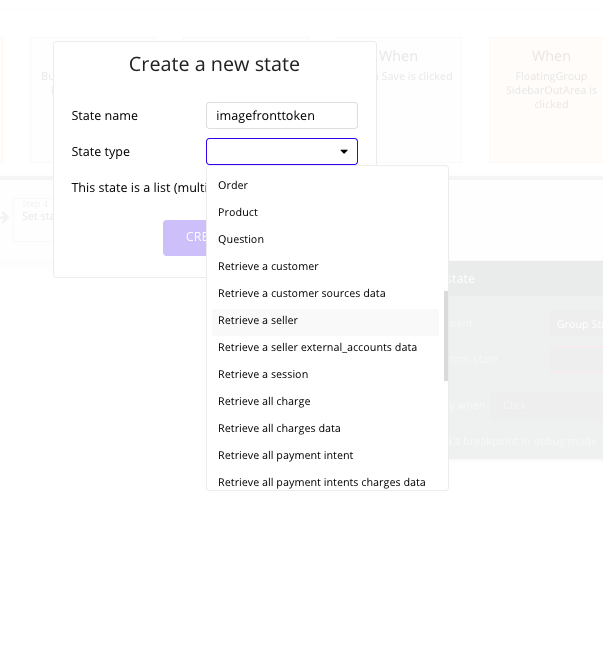
So, for this state when pictureUploader’s value is changed, you choose a type of image when you create a new one:
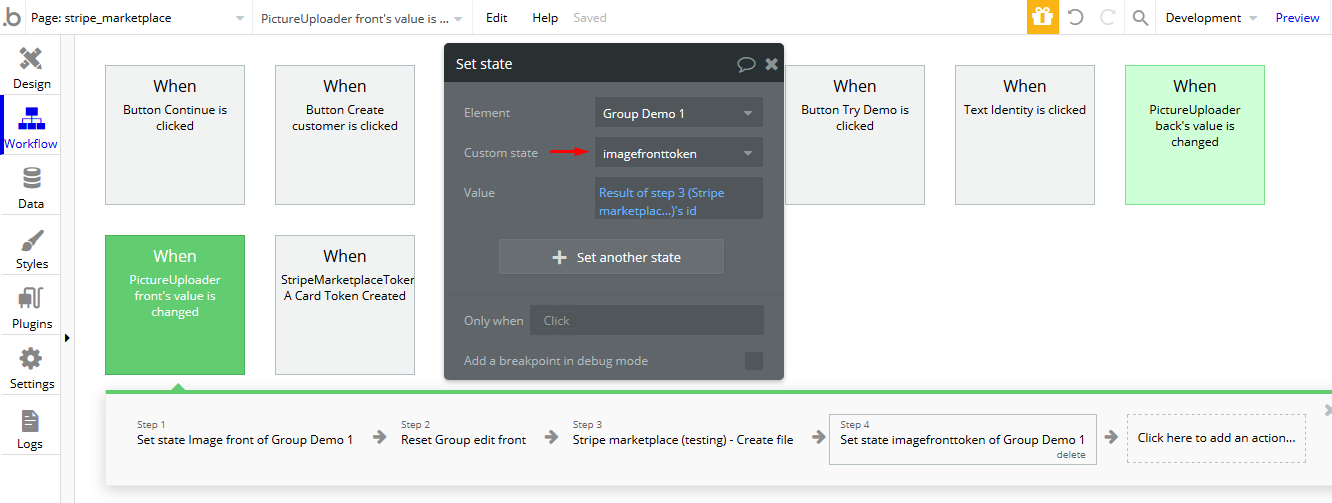
But for this one:

You choose the type text, because its value is based on the previous step’s id, which evaluates to a text value.

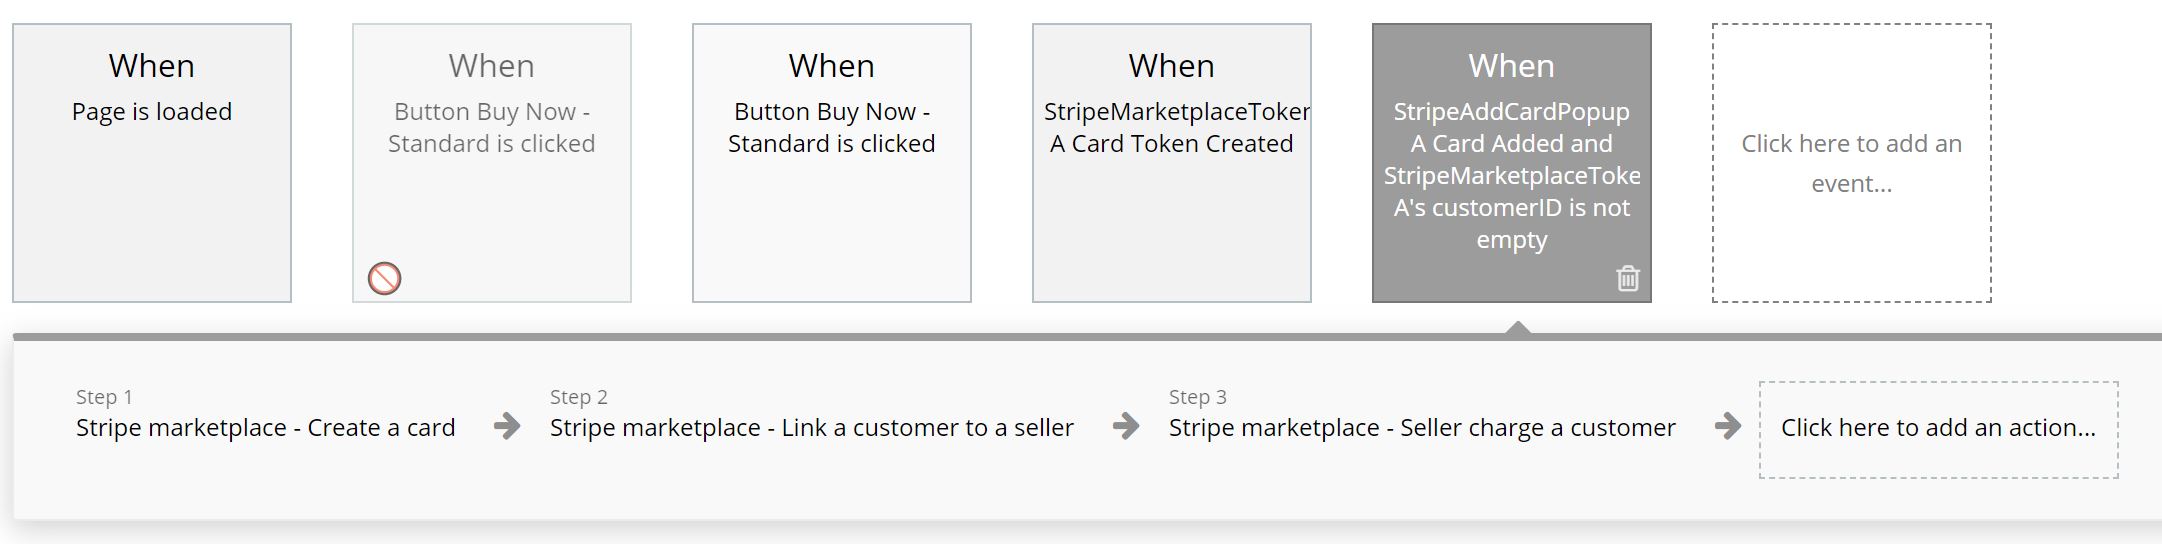
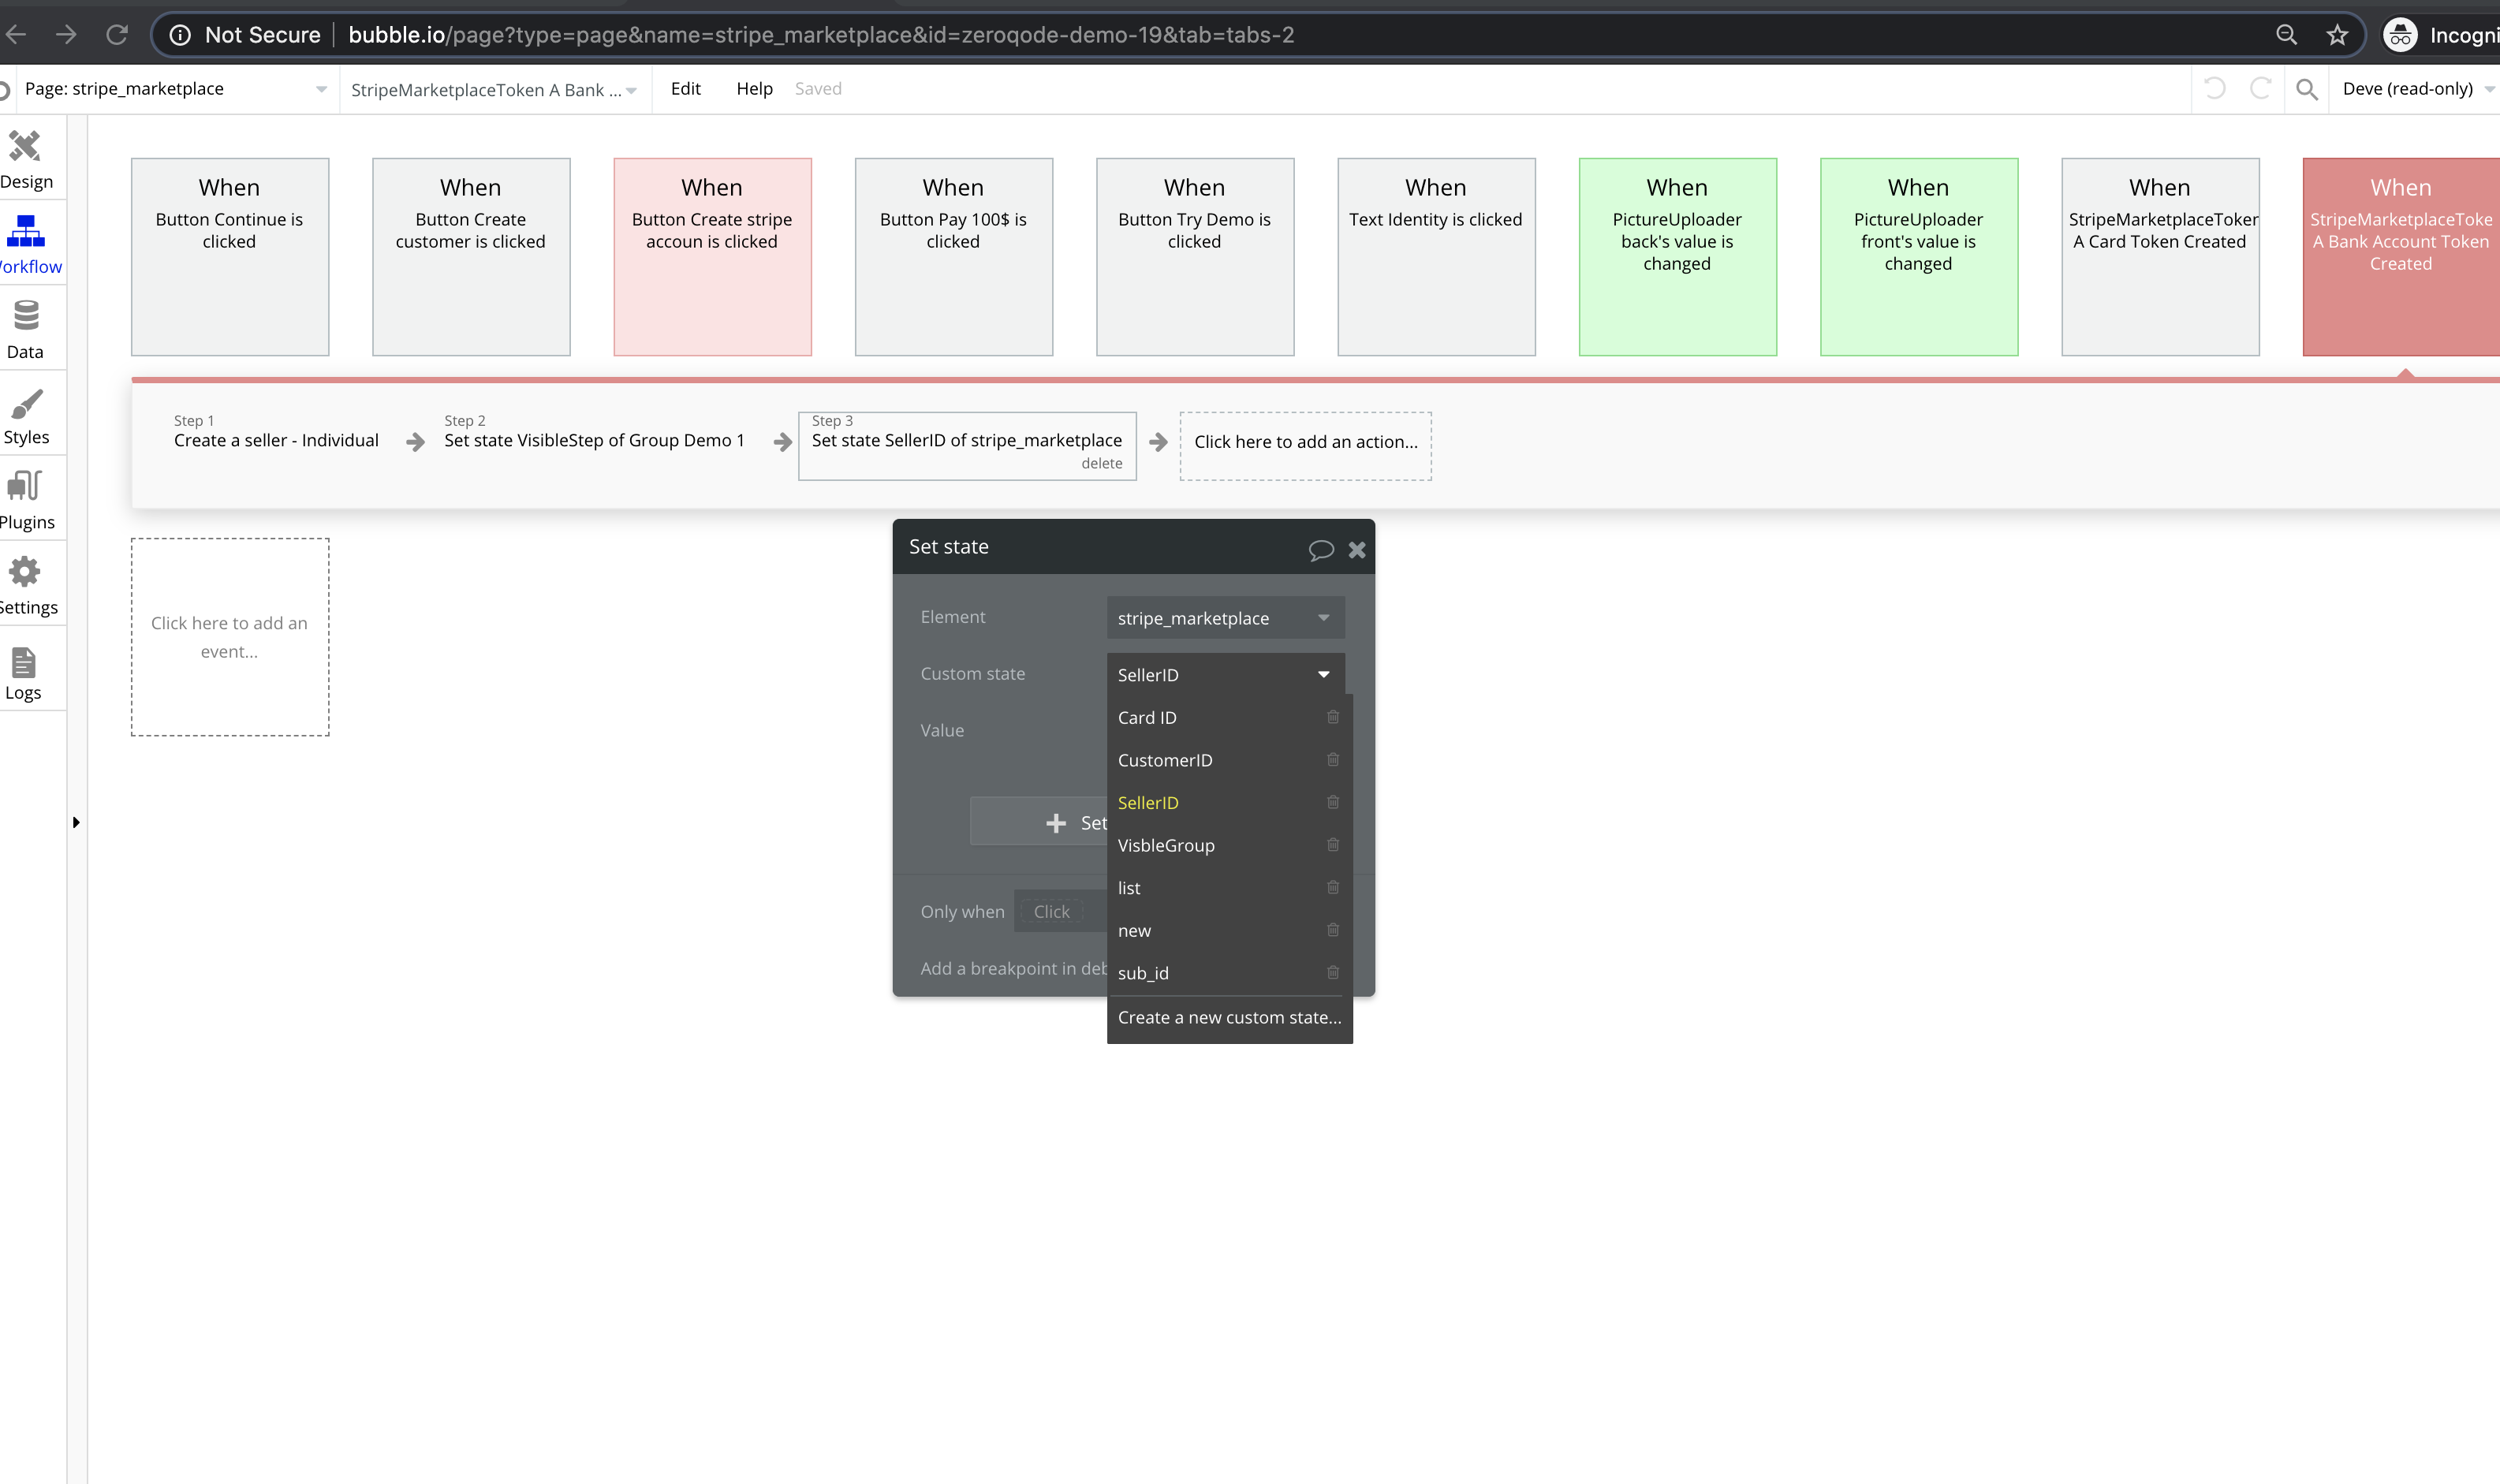
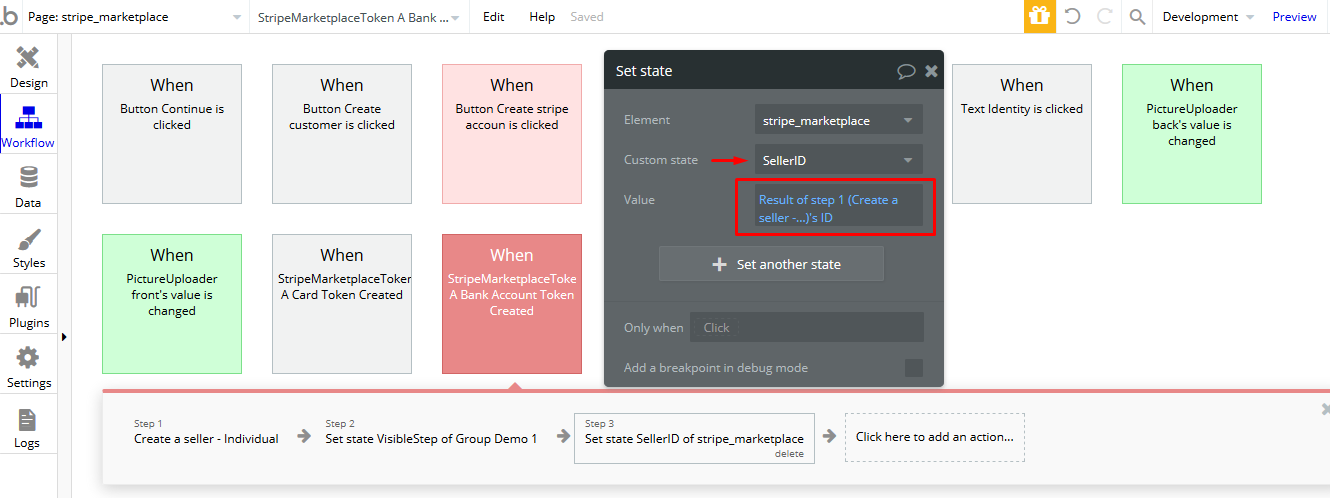
As for the SellerID, you select the appropriate one called SellerID:

But, it would be best to save this value into your database (first, you have to create a field in your User table called SellerID), by using the Make changes to thing action and you select the Current User as thing to change, then add the SellerID field to change as well, and you assign to it the value of the previous step:

image

Because you’ll need this seller ID later on, so it would be best to have it saved in your Bubble database.

Hope it helps.

1 Like

Thank you for clarifying !!

1 Like

@alexandru I got it to work but when I am in the live version of my bubble app the stripe link is still showing Development Mode and has the wrong redirect (I added URI in stripe account).

How do I fix these two issues?

Hi @AlexaAnne,

Thanks for your feedback. In order to fix the Live VS Dev mode issue, you have to make sure that you have configured the plugin in the Plugins Tab with appropriate keys and IDs for Live mode and different ones that intended for Dev mode. Please check our docs for guidance. This is how you switch between Live and Test mode in your Stripe dashboard:

image

The same thing for the redirect_uri, you have to add them separately for Live and Test modes, and also configure them in your workflows to be the appropriate ones that you like.

Thanks!

2 Likes