Services Plugins FAQs

Until you have purchased the template, you cannot add, delete or edit anything for security purposes

Until you have purchased the template, you cannot add, delete or edit anything for security purposes.

I had purchased the template and signup with the Personal plan as well so how am i able to remove the function above so i can add, delete and edit from the Admin panel?

Hello, @zuessolution!

Thank you for your query.

Yes, after you have purchased the template, you will be able to modify it, cause all our templates are fully customizable.

Let me guide you through the process of adding this template in full mode.

Firstly, when you’ve purchased the template, this window popped up Screenshot by Lightshot
After that, in order to use this template, you need to create a new App Screenshot by Lightshot
Doing so, kindly chose the template you’ve got from the drop-down Screenshot by Lightshot

After that, you will be redirected to your Bubble editor within this template. Keep in mind, that depending on the template you are using, there are some settings, that you need to adjust. For example, if a template has some plugins inside, that have to be set up, you need to do the same in your editor.

What exactly settings you need to set up and how to use a template, in general, you can find in its documentation. As you haven’t specified, which exactly template you’ve bought, I will give you the link to our general documentation, where you can search information about your template https://docs.zeroqode.com/

To skill-up and familiarize with the Bubble platform in general, so you can master the usage of your template and creation of the app that is fulfilling your goals, please check these resources:

Please, let me know if you’ll have any other questions.

Best regards,
Elena.

Hi Elena

The template that I bought was Learny - e-Learning SaaS.

Hello, @zuessolution!

Thank you for providing the name of the plugin.

To set up admin rights, you need to create a new user, and input “admin” in AcessRights field in Editor in DB for this particular user https://prnt.sc/13nvx9i. To do so go to Data–App Data–All Users.

Afterward, when you choose page “admin”, where you saw that red banner from the screenshot, you can set up its visibility, depending on the rights of the user, who will be logged in in your app. Or, while you set it up and customize it, you can just delete it (as an element from the page).

Also, some of the buttons have a condition, when they are active or not, depending on the logged-in user’s rights.

For example, the button “Add New” has the following condition https://prnt.sc/13nw3sq - as you see, there is demo@admin.com here, which, by default setting of this template, has admin rights. So In order to change/customize this button’s functionality, you need to change the email here. When you create a new user, that will have admin rights, make sure you will put that email in this condition.

Follow the same steps while creating a workflow for other elements that are not clickable under the admin page.

Also let me give you now a direct link to this template’s documentation, which will help you in setting it up. Although the documentation for this plugin is not giving a detailed guide on all the settings (due to its complexity), it can lead you in the right direction. We are working on the improvement of all our documentation database and gradually it will all be updated.

I am here for you if you need to clarify anything else.

Best regards.

Hi Elena

Thank you so much for the information. Guess let me try out the new information or direction first. Will buzz me if I need more help.

Hi Elena

Learny - e-Learning SaaS

Is there any login page for this Admin or way to make all the button clickable with the condition of the current user logged in? I think the problem is due to the admin page do not come with a login page to verify the admin accessRight.

Greetings!

The login workflow works the same for all types of users. There is no need to create a separate login functionality for the admin user.

Some functional buttons on the admin page (such as Add/Edit/Remove) have set up conditions, that manage their accessibility. These conditions were made to limit the access to the demo data (to prevent users from removing test data from the template). So to make all the desired buttons clickable, you need to check their conditions. For example, sometimes it can be a simple checkbox, that prevents the button to be clicked if a particular user is logged in:

You can remove those conditions from the functional buttons, or adjust them to your admin’s account - it’s up to you.
It’s not a short process, to adjust all elements according to your needs, but it’s pretty much the same, which is good news:)

And here once again I would like to mention, that having a strong understanding of how the Bubble works and having advanced Bubble skills is crucial. Because the work has to be done by you.

Best regards.

Hi Elena

I am still going through all the conditions at the Admin page workflow for functional buttons (Add/Edit/Remove). Anyway, I managed to get some to work. Even put up a login page for the Admin. Changed the Admin Group Menu and Pop Up Menu destination page.

Now stucked with Stripe parameter payment_method_type learny e-learning saas Stripe Error

Hi, @zuessolution!

Let’s find out more about your case.

Here the error is indicating empty fields from the API settings for the Stripe plugin.

In order to fill it up, please, go to Plugins–API Connector, then –

after here

and fill out the following fields

Let me know how it worked out for you.

Best regards.

Hi Elena

Thank for your help earlier. Anyway I managed to get it done and modified the key value as well to my Stripe Secret Key.

After that I tested the connection with the new setting and encountered “Something went wrong. You might be having a network connection problem, or the payment provider cannot be reached at the moment.learny e-learning saas Stripe 2

When I checked my Stripe Dashboard > Developer > Logs, I don’t see any error but 200 OK
POST /v1/checkout/sessions

Hey, @zuessolution!

Let’s check out one more thing. Please, make sure, that you have filled up the values for these keys

If you still are going to have difficulties here, can you please add our Support Team email to the list of collaborators to your application and provide me a link to your application? This will allow us to check your settings and run some tests to fix the mentioned problem.

To add our Support Team as a collaborator, you need to do the following steps in the Bubble Editor:

Settings > Collaboration > Add email support@zeroqode.com

Note: avoid the warning message regarding the plan, as we are an agency and you can easily add us to your collaborators.

Waiting for your reply.

Best regards.

Hi Elena

I have filled up the value for both the keys with the secret key (stripe). Also adding the support into the system.

Hello, @zuessolution!

Thank you for providing the access to your editor.

I’ve checked the settings and data in your editor and found some issues in the API Connector regarding the calls. I’ve fixed it for you, to make the process faster. Basically, I just reinitialized calls for different action types, taking the data from Stripe itself. There is no need to refer to that section anymore.

Another thing, that now you have to do is to fill out the following values, using the API Keys from your Stripe account. Go to the pricing page, and choose to edit it. In the opening, menu click on the element shown in the screenshot

In the section on the left with fields for formatting insert the data from Stripe. Where to get those keys you can see from the next screenshot

Test it out and let me know.

Best regards.

Hi Elena

Thank you a lot for your quick fix. Anyway, in order to change my site subscription plan from a default plan, I encountered this error. learny e-learning saas Stripe 3

But I managed to get it done by configuring my Stripe customer portal > enable Payment methods & Update subscriptions. Then added 3 existing products in the Added products section.

Now the change of plan is done at the Stripe level.

.

Am I doing it the right way or better to reconfigure the API Connector > Create subscription upgrade session at the BUBBLE level?

Hello, @zuessolution!

As per the error you got, the changes should’ve been made exactly in your Stripe account, so you did the right job:) The second screenshot is displaying that everything is set up correctly.

I am really glad that I was able to be helpful!

And, as usual, drop us a line if you’ll have any other questions.

Best regards.

Hi Elena

My live and development site is not the same. Do I need to always Copy data from Dev to Live DB? Or there is a better way?

Does Learny Saas come with Trial Plan (14 days) workflow? Also, how can I cancel the course as a user once I enrolled on it?

Another issue is with the Comment section. I can’t detect any wrong with it. It is not showing the Information from Comment.

Greetings, @zuessolution!

As it is not really clear, what elements are not displaying the same, kindly provide more details, with the screenshots.
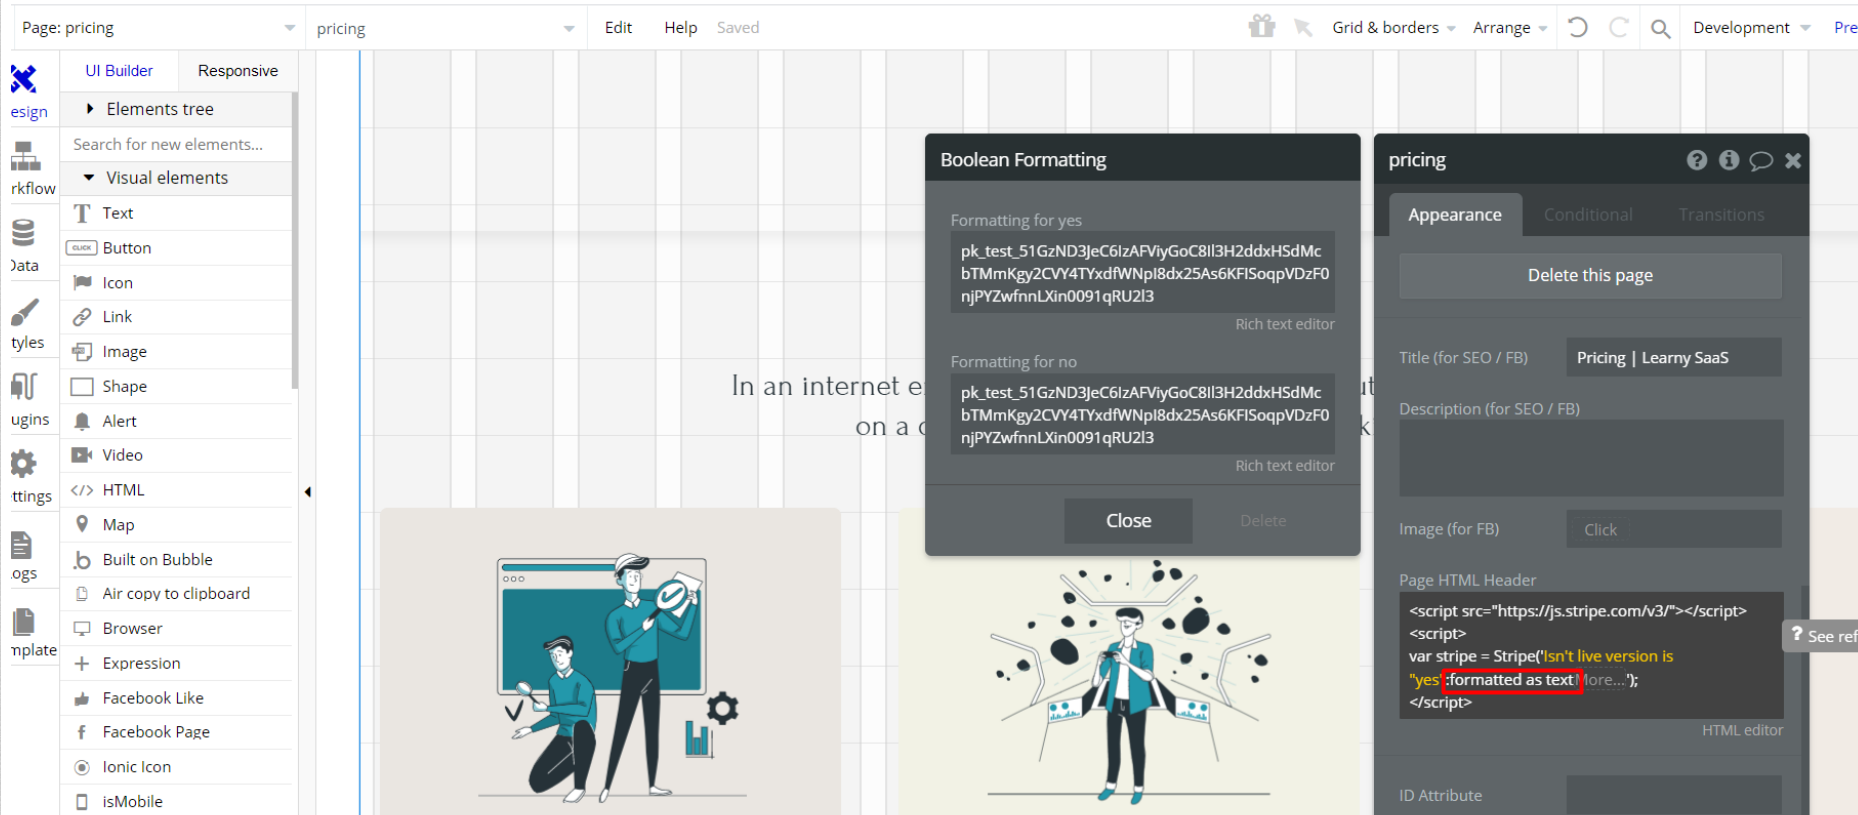
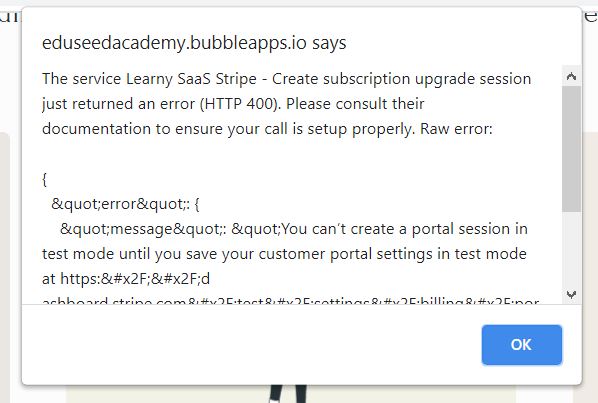
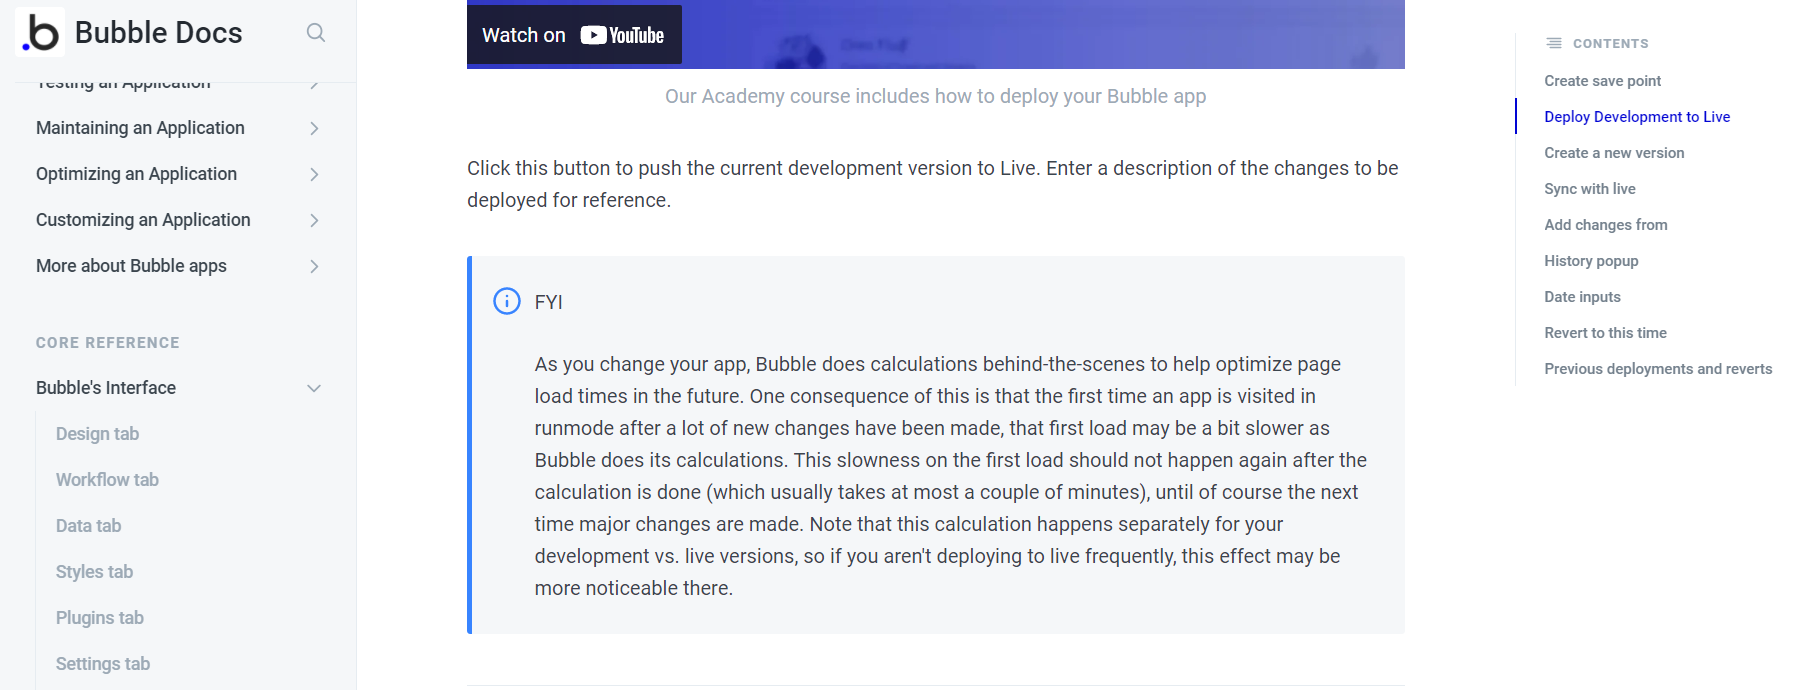
One point I would like to mention here, that you need to make sure that you are giving it enough time for the live version to display all the changes made. An open explanation is given here:

There is no need for that. First, try out your design solutions and settings in the Development version, and once you are happy with the result and you don’t want to change anything else - go for deployment:)

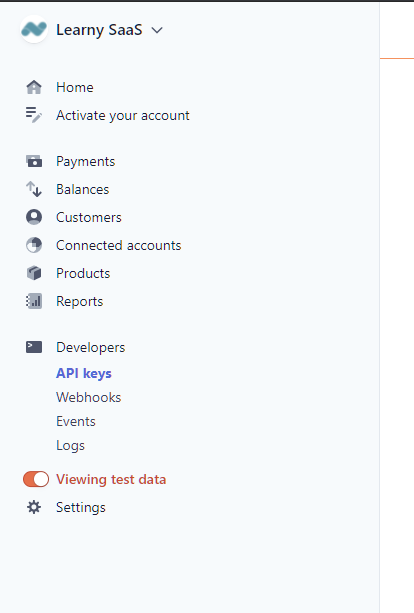
Regarding this point, I would also like to redirect you to our documentation, where we have a section dedicated to Data and its modification.

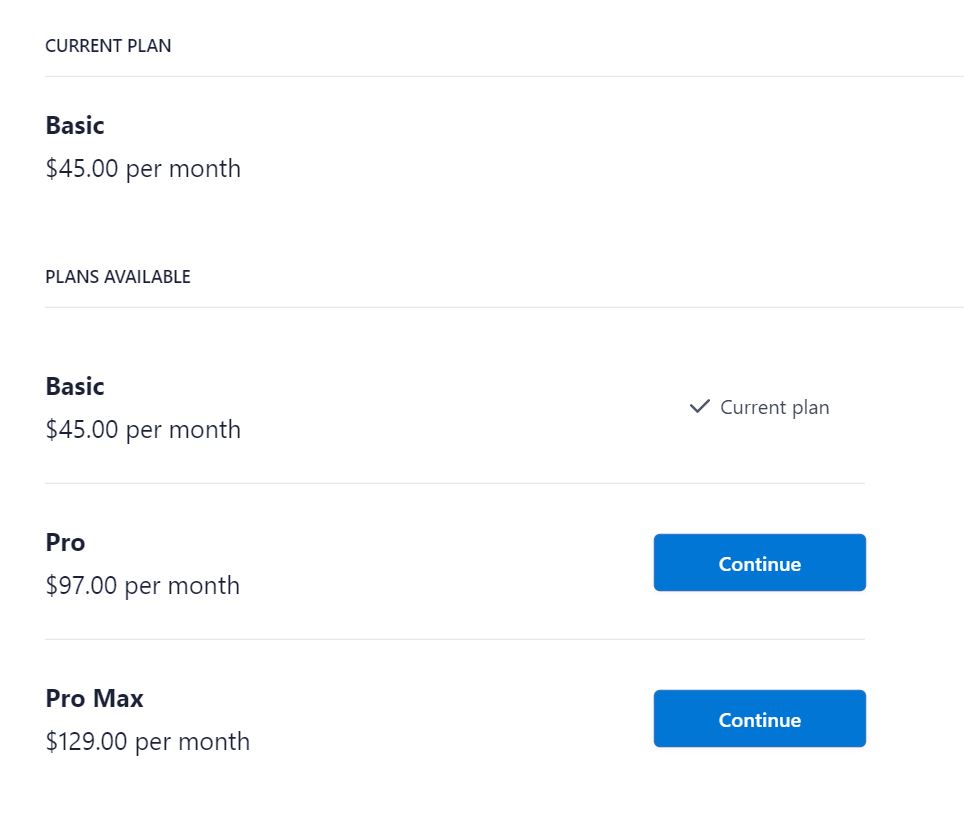
At the moment the template has the three following plans: Basic, Pro, and Pro Max. There is also an option to provide coupons for users to get a discount.
However, as the template is fully customizable, you can add this option by yourself at any time. In order to do that we recommned having at least intermediate Bubble skills. Our support services don’t cover step-by-step guidance of any custom implementation.

If you need our help as developers you can apply for the customization service that we provide (if you are interested in, please let me know I’ll provide detailed info), or alternatively, you can hire any Freelance Bubble developer or Agency.
See the freelance category on bubble forum and post a request: https://forum.bubble.io/c/freelance or sent a proposal: RFP | Bubble

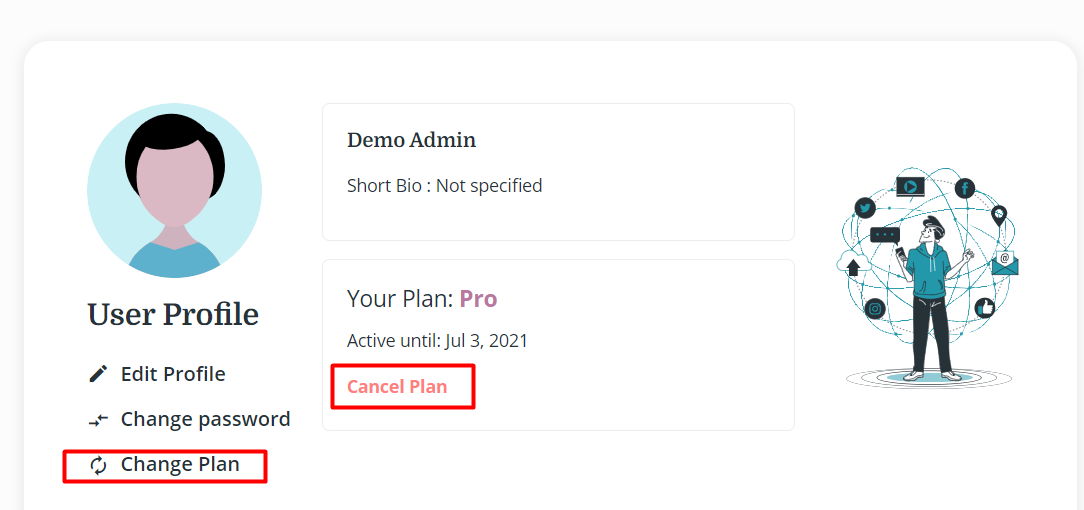
As a user you have a possibility to cancel the subscription plan, it is a part of the options that are built-in within the template and is available in the user’s profile:

You can see from the screenshot you also have a possibility to change the subscription plan.
This functionality you can find in the “profile page” of the editor.

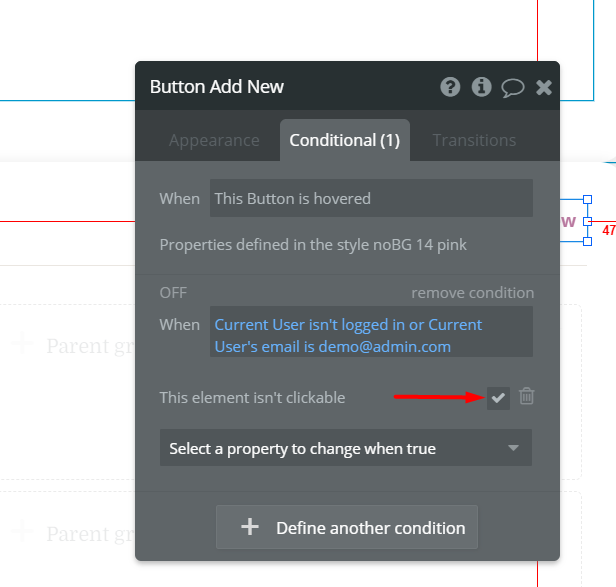
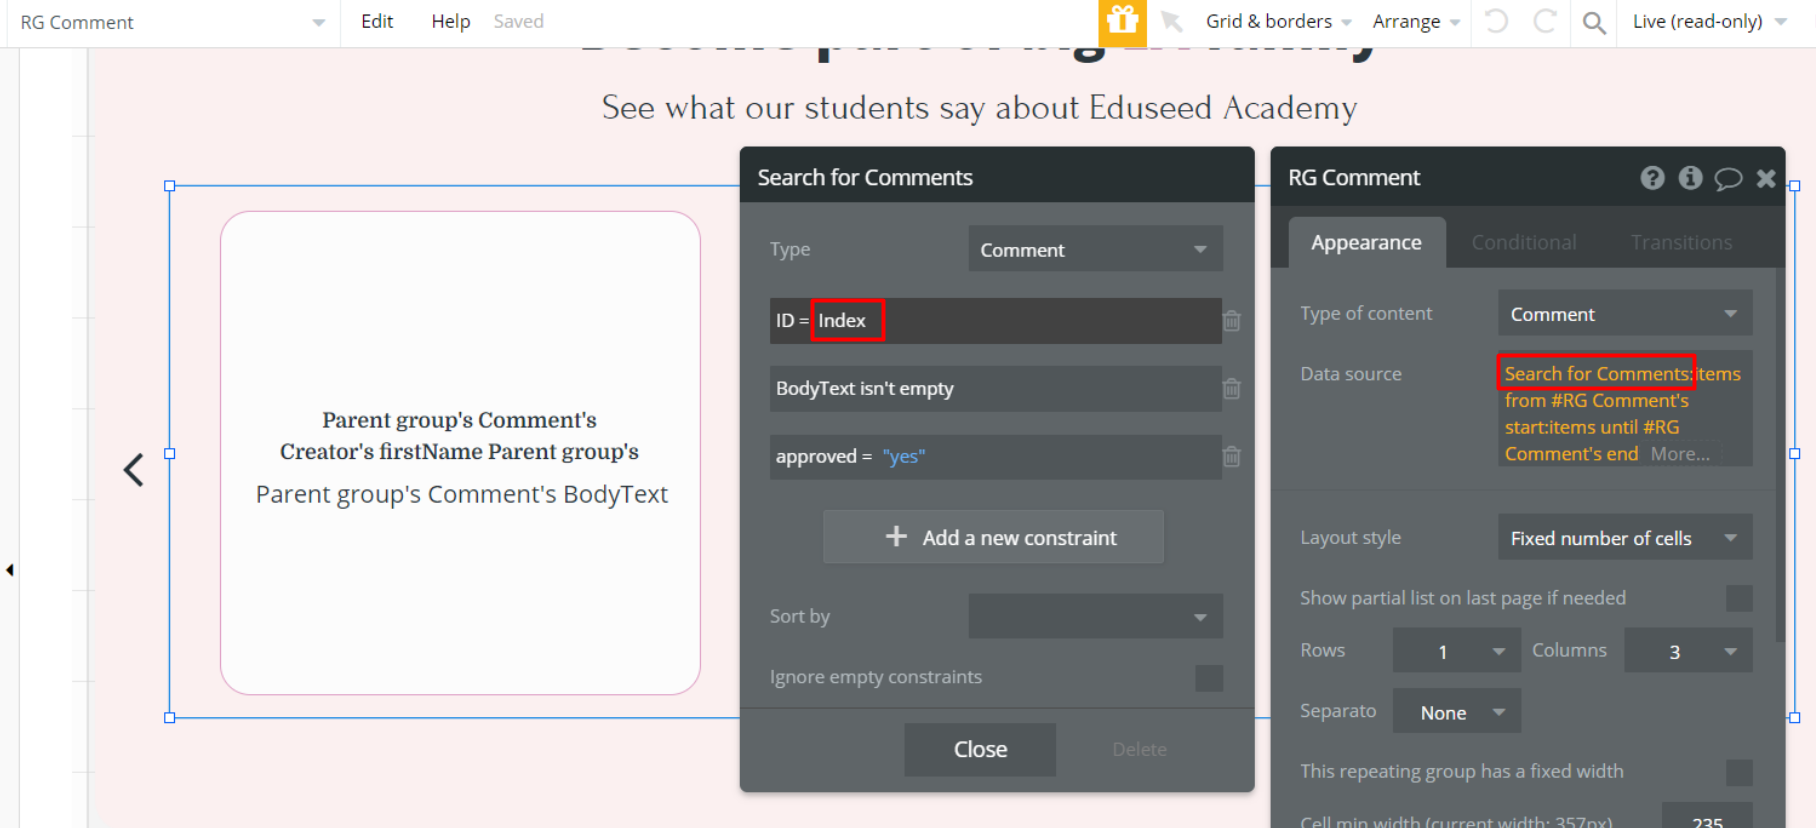
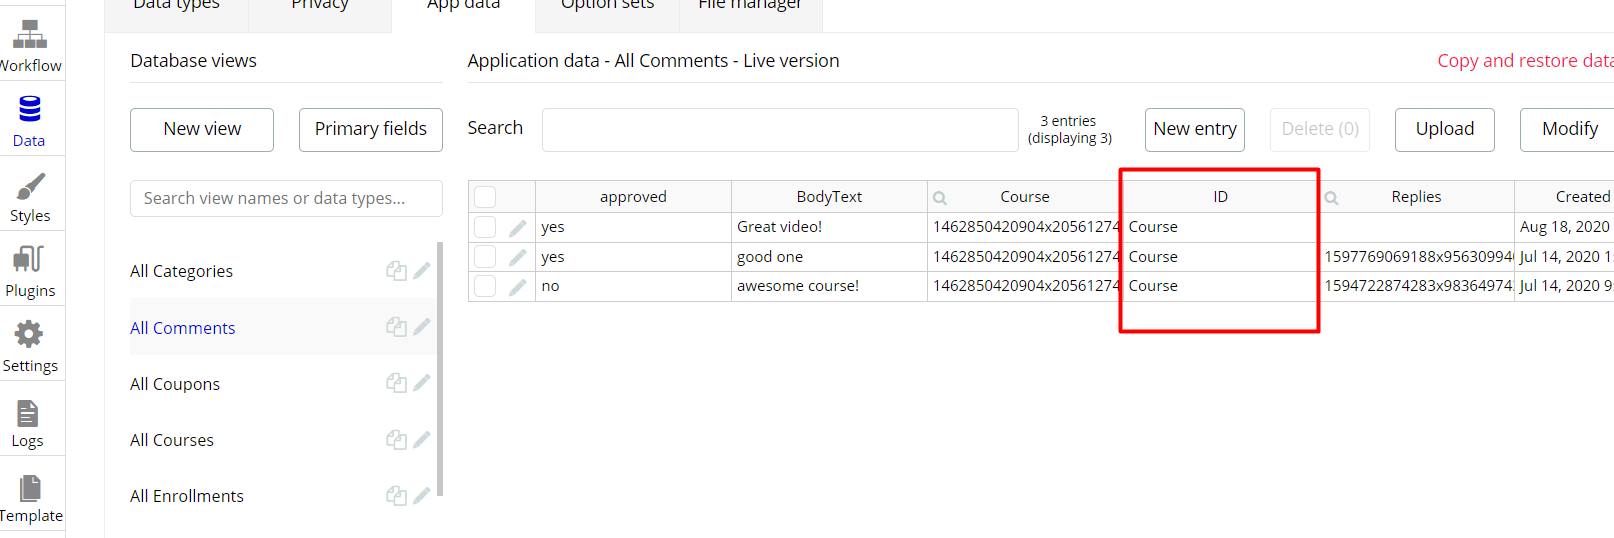
In order for the comments to be displayed, kindly change the ID value from “Index” to “Course”, as it is in the Database:


Best regards.

Hi Elena

Is it possible for Bubble to talk to Moodle LMS (API)?

Hi there!

You can create a wide range of different API calls in order to set up an interaction between two applications.

Please, refer to the Bubble documentation to see how it can be done.

Also, you will need documentation from Moodle - I searched for API info there and found it in the Developers section.

You can also use API Connector plugin, to make a bridge between Bubble and Moodle. Here is the information with a very detailed explanation, how to set it up and use it: https://airdev.co/post/using-bubbles-api-connector

If there is any other information, that you need clarification on, let us know.

Best regards.